

Measure and Installation Guide
- Reveal Fit Inside the window
- Face Fit On a window frame
- Face Fit On a square set window
Roller Blind Installation Guide
Installing internal roller blinds is a straightforward DIY project that can enhance the functionality and aesthetics of your windows. Here's a step-by-step guide to help you through the process:
- Tools & Materials Needed
- Tools:
- Measuring Tape
- Pencil or chalk
- Level
- Screws
- Power drill with appropriate drill bits
- Screwdriver
- Ladder
- Safety gear (gloves, safety glasses)
- Materials:
- Roller blind kit (including brackets, roller tube, fabric, and operating mechanism)
- Screws and anchors suitable for your mounting surface
- Motor and remote control (if motorized)
- Step-by-Step Installation Guide
- Preparation
- Choose the Installation Type : Decide whether to mount the blinds inside the window frame (recess fit) or outside the frame (face fit).
- Check for Obstructions: Ensure there are no obstructions like lights, vents, or other fixtures in the installation area
- Verify Mounting Surface: Ensure the wall or mounting surface is sturdy enough to support the blind's weight.
- Measure and Mark Bracket Placement
- Measure the Window: For inside mount, measure the width and height of the window frame. For outside mount, measure the desired width and height for the blind.
- Mark Bracket Placement: Use a pencil to mark the positions for the brackets. Ensure they are level and evenly spaced.
- Install the Brackets
- Drill Pilot Holes: Drill pilot holes at the marked positions for the brackets.
- Attach the Brackets: Secure the brackets to the mounting surface using screws and anchors suitable for your surface type.
- Mount the Roller Blind
- Insert the Roller Blind: Place the roller blind into the installed brackets. Ensure it is securely seated.
- Test the Roller Blind
- Operate the Blind: Test the blind by raising and lowering it several times to ensure it operates smoothly.
- Make Adjustments: If the blind does not operate correctly, check the bracket alignment.
- Tips for a Successful Installation
- Choose the Right Location: Install the blind in a sheltered area to protect it from strong winds.
- Handle with Care: Avoid pulling the blind too tightly during installation, as it can expand and contract with temperature changes.
- Safety First: Always use a ladder safely and wear appropriate safety gear.

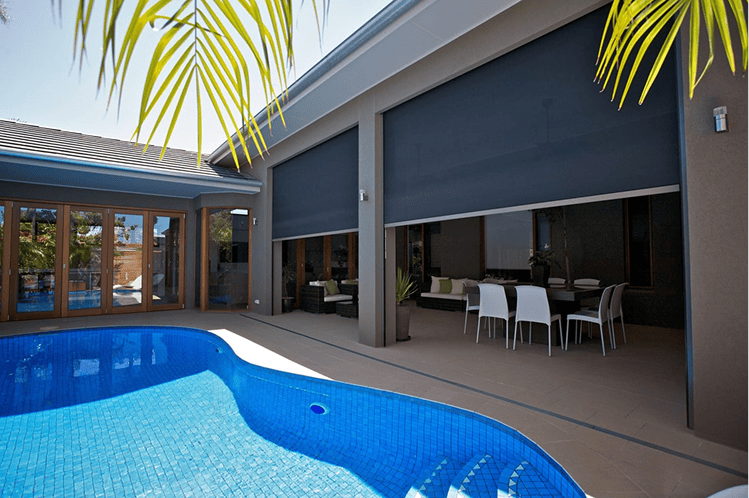
Zipscreen Installation Guide
Installing an Acmeda Zipscreen blind will enhances your outdoor space with effective sun, wind, and insect protection. Below is a step-by-step guide to assist you in the installation:
- Tools & Materials Needed
- Tools:
- Measuring Tape
- Pencil or chalk
- Level
- Screws
- Power drill with appropriate drill bits
- Screwdriver
- Ladder
- Safety gear (gloves, safety glasses)
- Materials:
- Zipscreen blind kit (including cassette/brackets, &side channels)
- Screws and anchors suitable for your mounting surface
- Crank handle or pull stick (if manual operation)
- Motor and remote control (if motorized)
- Spring tension adjustment tool (if spring-operated)
- Step-by-Step Installation Guide
- Preparation
- Choose the Installation Type : Determine whether you're installing the Zipscreen as a face fix (mounted on the wall) or a recess fix (mounted inside a cavity).
- Check for Obstructions:: Ensure there are no obstructions like lights, vents, or other fixtures in the installation area.
- Verify Mounting Surface: Ensure the wall or mounting surface is sturdy enough to support the awning's weight.
- Mount the Cassette or Brackets
- Align the Cassette or Brackets: Position the cassette or brackets where you want to install it, ensuring it's level.
- Drill Pilot Holes: Drill pilot holes into the mounting surface through the cassette's or brackets mounting holes.
- Secure the Cassette: Attach the cassette or brackets to the mounting surface using screws.
- Install the Side Channels
- Position the Side Channels: Align the side channels vertically on both sides of the cassette or brackets.
- Drill Pilot Holes: Drill pilot holes through the side channels into the mounting surface.
- Secure the Side Channels: Attach the side channels to the mounting surface using screws.
- Install the Blind Fabric
- Insert the Spring/gearbox/motor Control End: Insert the control end of the blind into the cassette/brackets.
- Connect the Idler End: Connect the idler end.
- Unroll the Fabric: Gently unroll the fabric down the side channels while inserting side zip into inner channels.
- Adjust the Fabric: Ensure the fabric is centred and aligned properly within the side channels then screw off inner channels through the outer channels
- For Spring operation: Adjust Spring Tension
- Locate the Tension Adjustment Mechanism: Find the spring tension adjustment mechanism on the spring control end.
- Adjust Tension: Use tool to adjust the spring tension until the blind operates smoothly.
- Test the Operation: Raise and lower the blind several times to ensure it operates smoothly.
- Tips for a Successful Installation
- Choose the Right Location: Install the blind in a sheltered area to protect it from strong winds.
- Handle with Care: Avoid pulling the blind too tightly during installation, as it can expand and contract with temperature changes.
- Safety First: Always use a ladder safely and wear appropriate safety gear.
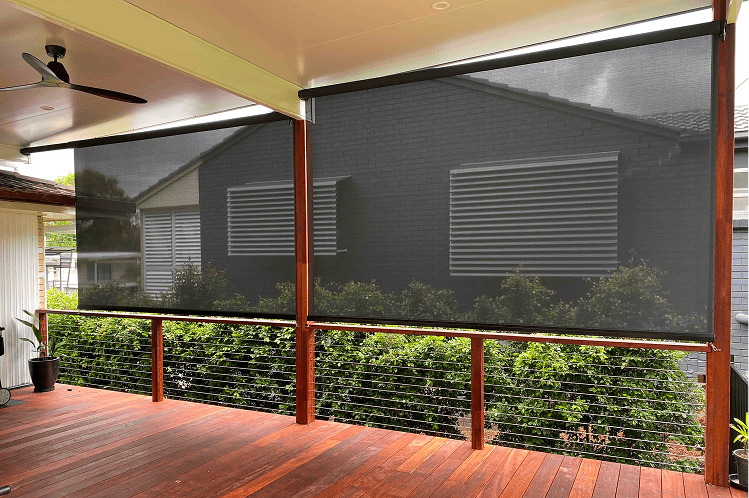
Outdoor Wire Guide Installation Guide
Installing an outdoor wire guide blind is a practical way to enhance your alfresco or patio area with effective shade and wind resistance. Here's a step-by-step guide to help you through the installation process:
- Tools & Materials Needed
- Tools:
- Measuring Tape
- Pencil or chalk
- Level
- Screws
- Power drill with appropriate drill bits
- Screwdriver
- Ladder
- Allen Key
- Safety gear (gloves, safety glasses)
- Materials:
- Wire guide blind kit (including brackets, blind, and guide wires)
- Screws and anchors suitable for your mounting surface
- Wire guides
- Step-by-Step Installation Guide
- Measure and Mark Mounting Points
- Determine the desired position for your blind.
- Use a measuring tape to mark the locations for the top brackets, ensuring they are level and equidistant from each end.
- For a clean installation, use a chalk line to mark a straight line across the mounting surface.
- Install the Top Brackets
- Align the brackets with the marks you've made.
- Drill pilot holes into the mounting surface (e.g., wall or ceiling).
- Secure the brackets using screws, ensuring they are tight and level.
- Prepare the Wire Guides
- Trim the wire to the appropriate length, allowing for some slack.
- Mount the Roller Blind
- Position the side guides against the mounting surface, aligning them with the top brackets.
- Secure the guides in place at top only
- Ensure the wires are vertical and attach bottom brackets to floor (Do not secure wires off to bottom brackets yet)
- Install the Blind
- Lift the blind and hook it onto the installed top brackets.
- Ensure the blind is securely seated and operates smoothly.
- Install Bottom of Side Guides
- Slot the wire guides through the ends of the blind’s bottom bar.
- Screw the guides into the bottom brackets
- Adjust and Test the Blind
- Manually test the blind to ensure it raises and lowers smoothly without obstruction.
- Adjust the side guides if necessary to ensure the blind moves freely.
- Tips for a Successful Installation
- Choose the Right Location: Install the blind in a sheltered area to protect it from strong winds.
- Handle with Care: Avoid pulling the blind too tightly during installation, as it can expand and contract with temperature changes.
- Safety First: Always use a ladder safely and wear appropriate safety gear.

Straight Drops Blinds Installation Guide
Installing an outdoor straight drop blind is a straightforward DIY project that can enhance your outdoor space by providing shade and privacy. Here's a step-by-step guide to help you through the process:
- Tools & Materials Needed
- Tools:
- Measuring Tape
- Pencil or chalk
- Level
- Screws
- Power drill with appropriate drill bits
- Screwdriver
- Ladder
- Safety gear (gloves, safety glasses)
- Straight drop blind kit (including brackets& blind)
- Step-by-Step Installation Guide
- Measure and Mark Mounting Points
- Determine the desired position for your blind.
- Use a measuring tape to mark the locations for the top brackets, ensuring they are level and equidistant from each end.
- For a clean installation, use a chalk line to mark a straight line across the mounting surface.
- Install the Top Brackets
- Align the brackets with the marks you've made.
- Drill pilot holes into the mounting surface (e.g., wall or ceiling).
- Secure the brackets using screws, ensuring they are tight and level.
- Prepare the Blind
- Unroll the blind and identify the control side (manual or motorized).
- If your blind has a headbox, install first before inserting blind.
- Attach the Blind to the Brackets
- Lift the blind and hook it onto the installed top brackets.
- Ensure the blind is securely seated and operates smoothly.
- Install the Bottom Fixing Mechanism
- Attach the bottom of the blind to the mounting surface or floor to prevent movement.
- Adjust and Test the Blind
- If your blind is motorized, follow the manufacturer's instructions to set the upper and lower limits.
- Manually test the blind to ensure it raises and lowers smoothly without obstruction
- Tips for a Successful Installation
- Choose the Right Location: Install the blind in a sheltered area to protect it from strong winds.
- Handle with Care: Avoid pulling the blind too tightly during installation, as it can expand and contract with temperature changes.
- Safety First: Always use a ladder safely and wear appropriate safety gear.
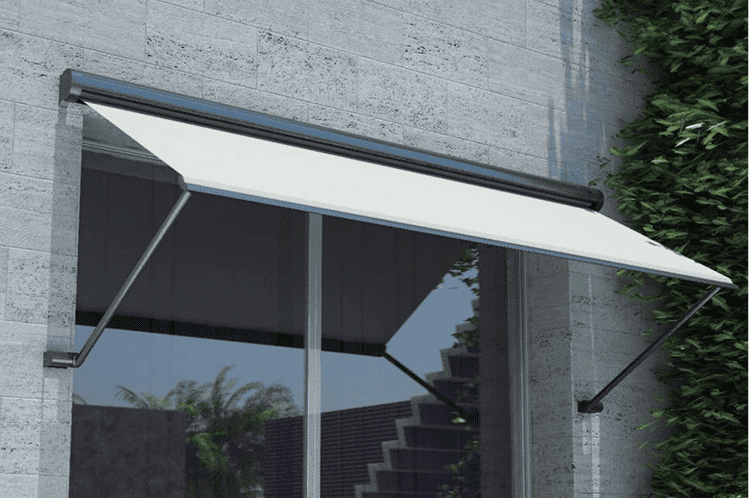
Pivot Arms Installation Guide
Installing an outdoor pivot arm awning enhances your outdoor living space by providing adjustable shade and ventilation. Here's a step-by-step guide to help you with the installation process:
- Tools & Materials Needed
- Tools:
- Measuring Tape
- Pencil or chalk
- Level
- Screws
- Power drill with appropriate drill bits
- Screwdriver
- Ladder
- Safety gear (gloves, safety glasses)
- Materials:
- Pivot arm awning kit (including cassette, arms, brackets, and fixings)
- Screws and anchors suitable for your mounting surface
- Step-by-Step Installation Guide
- Prepare the Installation Area
- Choose a location that is free from obstructions like lights, vents, or other fixtures.
- Ensure the wall or mounting surface is sturdy enough to support the awning's weight.
- Use a level to mark a straight line where the top of the cassette will be mounted.
- Mount the Cassette (or Brackets)
- Align the cassette (or brackets) with the marks you've made.
- Drill pilot holes into the mounting surface.
- Secure the cassette using screws, ensuring it is level and tightly fixed.
- Attach the Pivot Arms
- Determine the desired position for the arms (arm length is half the drop).
- Drill pilot holes into the mounting surface.
- Secure the arms ensuring they are level with each other and vertically level.
- Install the Awning Fabric
- Carefully unroll the awning fabric and attach it to the cassette (or brackets)
- Unroll the awning down and then attach arms to the bottom bar.
- Ensure the fabric is taut and free from wrinkles.
- Adjust the Awning Angle
- Adjust the pivot arms to achieve the desired angle for shade and ventilation.
- Tighten all fasteners to secure the arms in place.
- Test the Awning
- Manually extend and retract the awning several times to ensure it operates smoothly.
- Check that the awning is level and adjust if necessary.
- Tips for a Successful Installation
- Choose the Right Location: Install the blind in a sheltered area to protect it from strong winds.
- Handle with Care: Avoid pulling the blind too tightly during installation, as it can expand and contract with temperature changes.
- Safety First: Always use a ladder safely and wear appropriate safety gear.
Deep Channel Installation Guide
Installing an outdoor channel blind enhances your alfresco area by providing effective wind resistance and a sleek, modern appearance. Here's a step-by-step guide to help you with the installation:
- Tools & Materials Needed
- Tools:
- Measuring Tape
- Pencil or chalk
- Level
- Screws
- Power drill with appropriate drill bits
- Screwdriver
- Ladder
- Safety gear (gloves, safety glasses)
- Materials:
- Deep channel blind kit (including brackets, blind, and side channels)
- Screws and anchors suitable for your mounting surface
- Step-by-Step Installation Guide
- Measure and Mark Mounting Points
- Determine the desired position for your blind.
- Use a measuring tape to mark the locations for the top brackets, ensuring they are level and equidistant from each end.
- For a clean installation, use a chalk line to mark a straight line across the mounting surface.
- Install the Top Brackets
- Align the brackets with the marks you've made.
- Drill pilot holes into the mounting surface (e.g., wall or ceiling).
- Secure the brackets using screws, ensuring they are tight and level.
- Prepare the Side Channels
- Take measurements and make matching marks on the insides of your side channels, being as accurate as possible with your measurements.
- Drill a hole through the side channels at each mark.
- Use a small (3.5mm) drill bit to drill through the channel. Drill right through both the outside and inside surfaces of the channel. Then, use a larger (11mm) drill bit to widen the hole on the inside of the channel only.
- Install the Side Channels
- Position the side channels against the mounting surface, aligning them with the top brackets.
- Secure the channels in place using screws, ensuring they are vertical and level.
- Install the Blind
- Lift the blind and hook it onto the installed top brackets.
- Ensure the blind is securely seated and operates smoothly.
- Adjust and Test the Blind
- Manually test the blind to ensure it raises and lowers smoothly without obstruction.
- Adjust the side channels if necessary to ensure the blind moves freely.
- Tips for a Successful Installation
- Choose the Right Location: Install the blind in a sheltered area to protect it from strong winds.
- Handle with Care: Avoid pulling the blind too tightly during installation, as it can expand and contract with temperature changes.
- Safety First: Always use a ladder safely and wear appropriate safety gear.
Australian Made
Quality locally made blinds, not cheap imports.
Australia Wide Shipping
Australian owned and operated.
Streamlined Ordering
Order directly from the product page or using our bulk order form.
Simple Install
We guarantee all of our products can be installed DIY style with ease.
3 Year Warranty
We offer a full 3 year manufacturer warranty for your peace of mind.
