
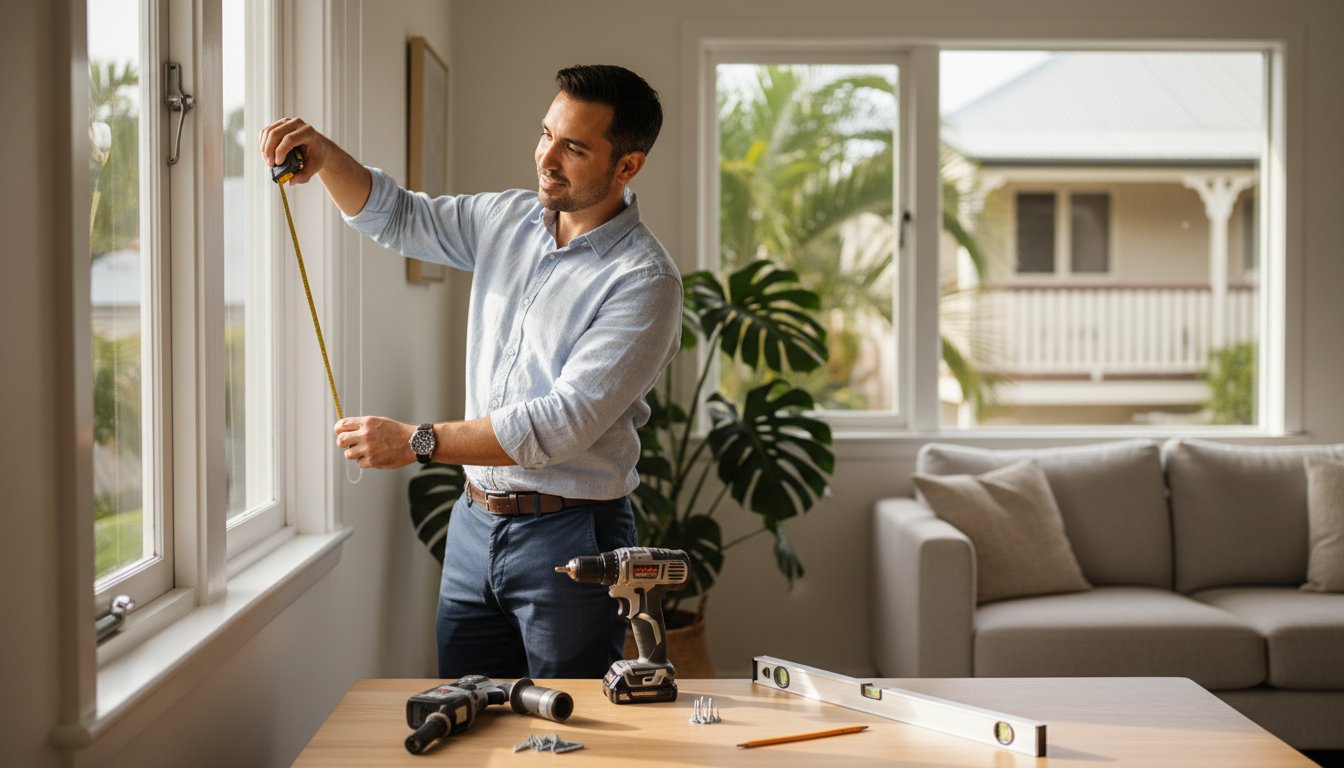
There’s nothing quite like the feeling of unboxing your brand new, custom-made blinds. But that excitement can quickly turn to a bit of head-scratching when it’s time for installation. Staring at a pristine wall, wondering which screws to use or if you’ve got the right drill bit, is a common worry. But don’t you worry. We’re here to take the guesswork out of the whole process and show you that getting a professional finish is absolutely within your reach. Having the right tools for installing blinds is the first and most important step to a flawless result.
Consider this your ultimate, no-fluff checklist for a perfect DIY installation. We’ll give you a dead-simple list of every tool you’ll need, whether you’re mounting on plasterboard, timber, or brick. Forget the cost of a professional installer; we’ll give you the confidence and the expert tips to hang your blinds perfectly, saving you money and giving your home that seamless, elegant look you’ve been dreaming of. Let’s get on the tools!
Key Takeaways
- Start with our no-fluff checklist of the 7 essential items you’ll need to measure, mark, and install your blinds like a pro.
- Confused by drills? We make it simple to choose the right drill and bit for the job, ensuring a perfect result every time.
- Learn the secret to a secure finish by matching your tools for installing blinds, like screws and plugs, to your specific wall type.
- Take your DIY skills to the next level with a few optional ‘pro’ tools that guarantee a faster, more accurate installation.
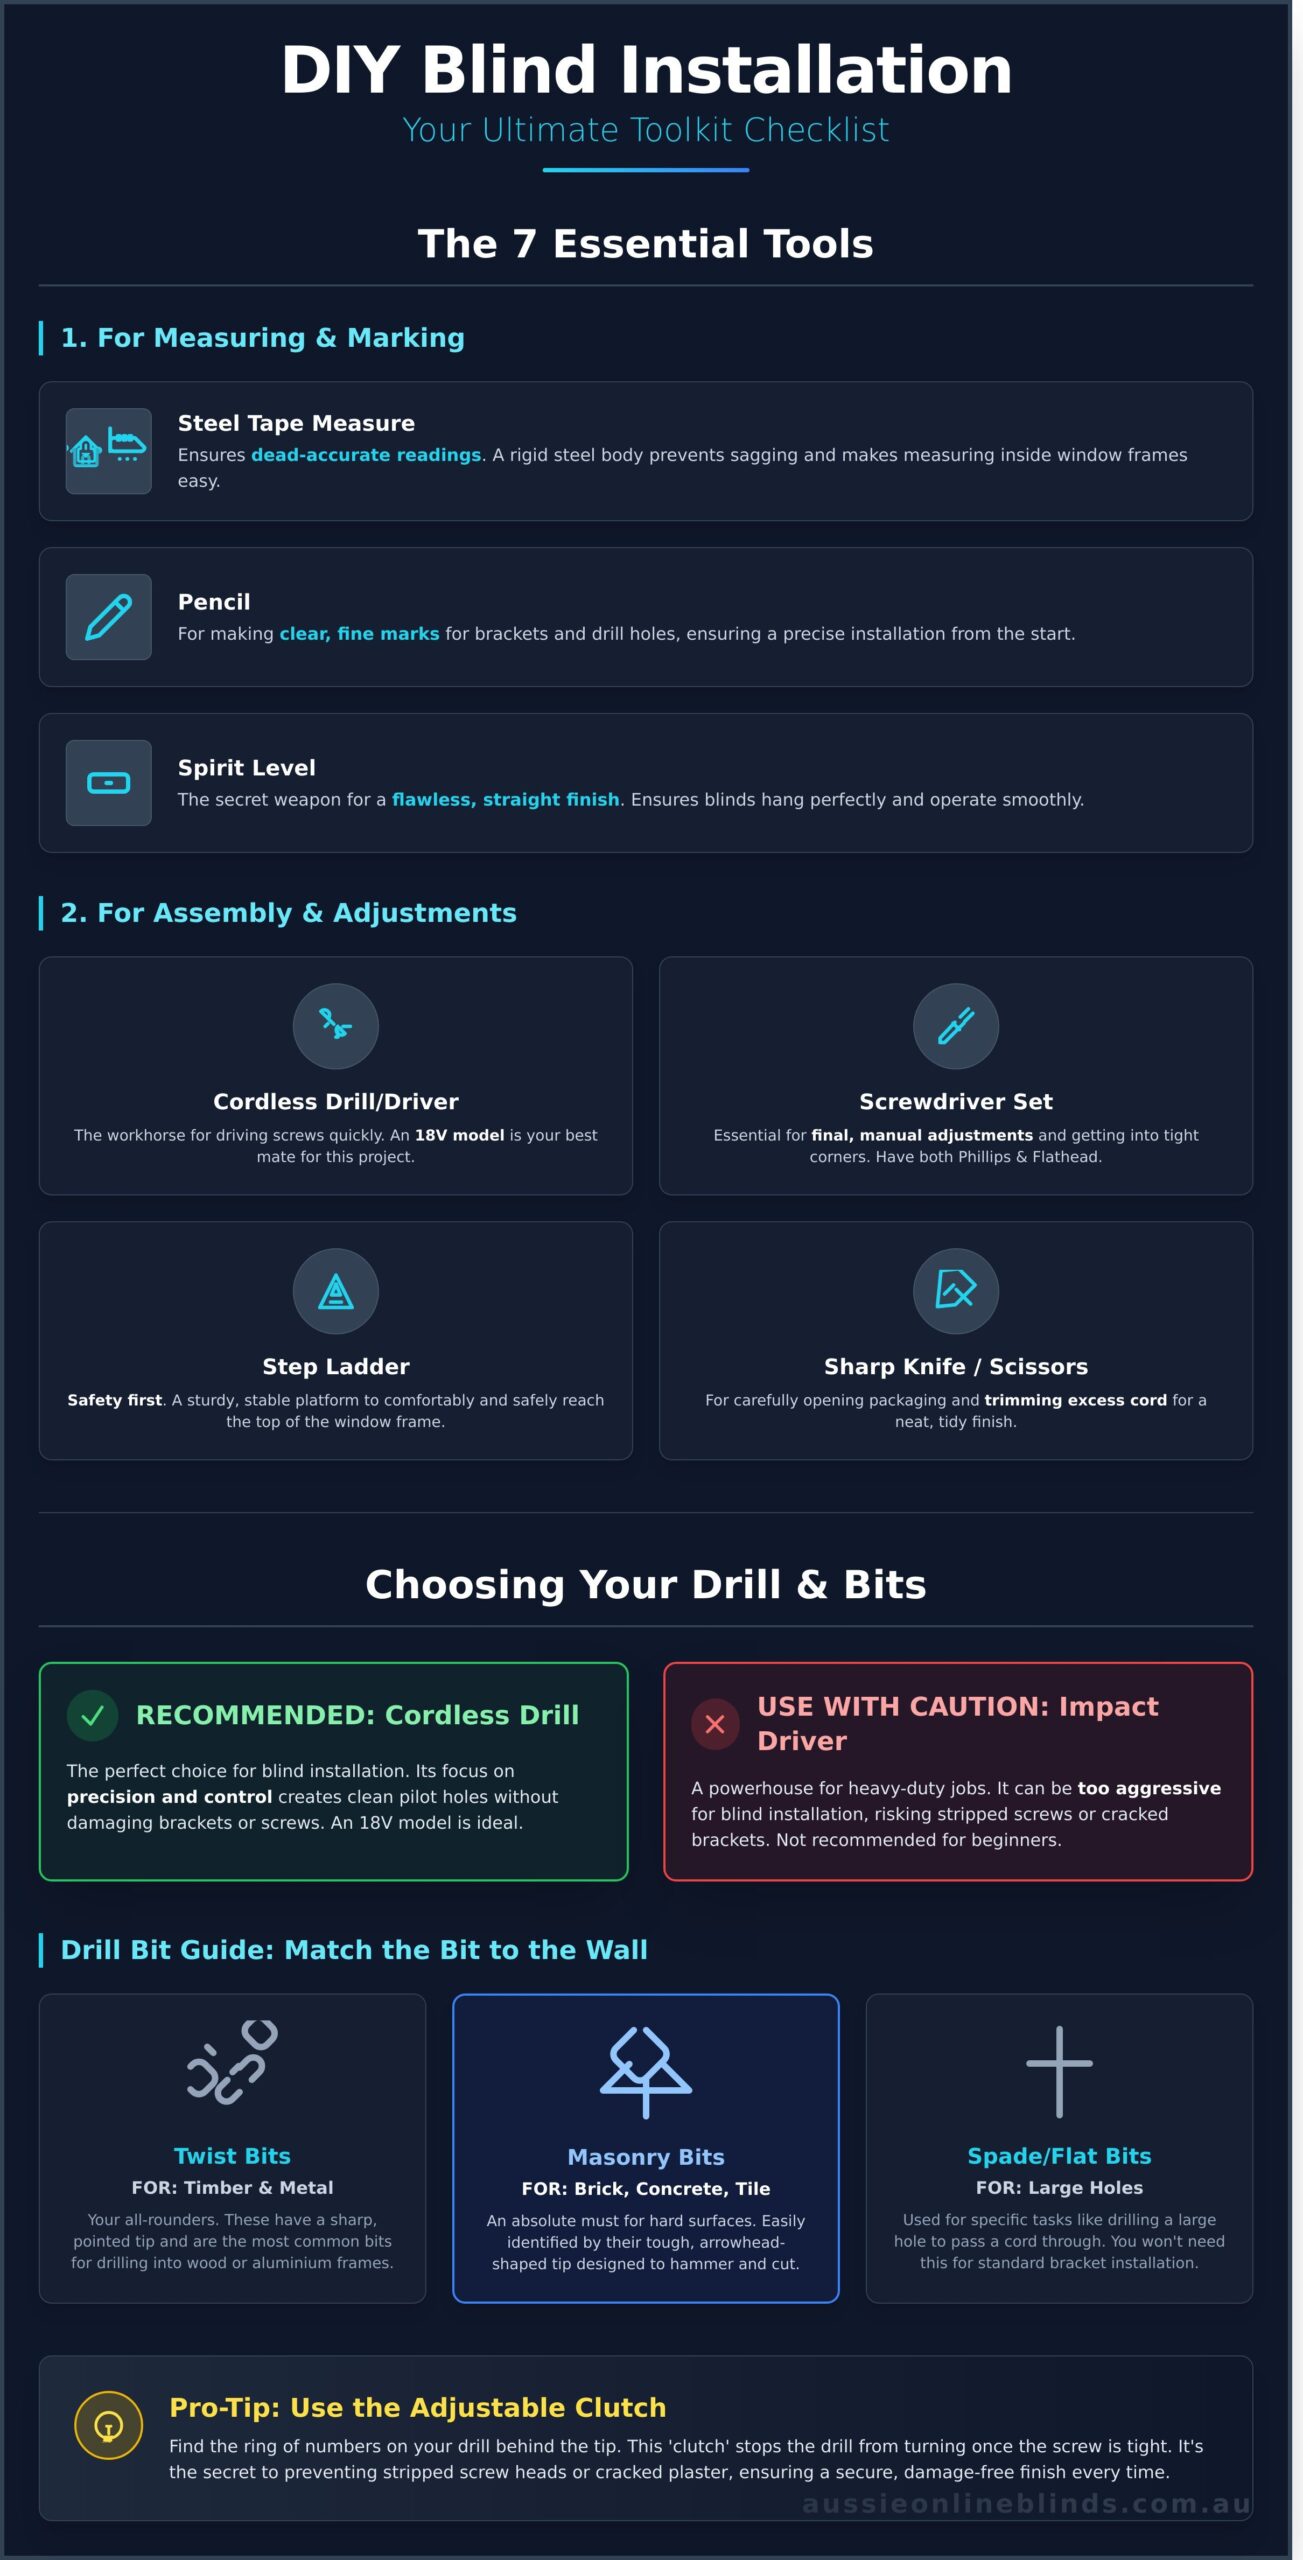
The Essential 7 Tools for Any Blind Installation
Right then, let’s get you sorted. Before you even think about fancy gear, there are a few non-negotiable items that form the basic toolkit for any blind installation. These seven essentials will see you through all the measuring, marking, and basic assembly needed for a professional finish. The good news? You’ve probably got most of these kicking around the garage or shed already. We’ll get into the nitty-gritty of power tools and wall-specific fasteners in the next sections, but for now, let’s cover the absolute must-haves.
For Measuring and Marking
Getting your measurements spot on is the key to a seamless look. It’s the classic ‘measure twice, drill once’ philosophy, and these tools make it a no-fuss job:
- Steel Tape Measure: Forget the flimsy sewing tape. A quality steel measure won’t stretch or sag, giving you dead-accurate readings every time. Its rigid body and hook make it easy to measure inside a window frame by yourself.
- Pencil: Simple, but mighty. A sharp pencil is perfect for making clear, fine marks for your brackets and drill holes, ensuring your installation is precise from the get-go.
- Spirit Level: This is your secret weapon for a flawless finish. A level ensures your brackets are perfectly aligned, so your new blinds hang straight and operate smoothly without catching or looking wonky.
For Assembly and Adjustments
With your marks in place, it’s time to put it all together. These are the core tools for installing blinds that handle the hands-on part of the job:
- Cordless Drill/Driver: This is the workhorse of the operation, making driving screws into the frame quick and easy. We’ll dive deeper into choosing the right one in the next section, as it’s a real game-changer.
- Screwdriver Set (Phillips & Flathead): Even with a drill, a good set of screwdrivers is essential for final, manual adjustments or for getting into tight corners. Your blind kit will come with screws, but knowing the different types of fasteners and having the right driver head on hand is always a smart move.
- Step Ladder: Safety first, mate. A sturdy step ladder gives you a stable platform to work from, allowing you to reach the top of the window frame comfortably and safely. No wobbly chairs!
- Sharp Knife or Scissors: You’ll need these for carefully opening the packaging without damaging your beautiful new blinds and for trimming any excess cord at the end for a neat and tidy finish.
Choosing Your Drill & Bits: A Simple Guide for Beginners
Right then, let’s talk about the tool that can seem the most intimidating: the power drill. If you’re new to the DIY game, don’t let it put you off. Getting your head around the basics is dead simple, and having the right drill and bit makes installing your new blinds a smooth and satisfying job. Think of it as the key to unlocking a professional finish, all on your own.
A quality cordless drill is one of the most essential tools for installing blinds, and it will serve you well for countless other projects around your Brisbane home.
Drill vs. Impact Driver: What’s the Difference?
You’ll see two similar-looking tools at the hardware shop, but they do different jobs. A standard drill is all about precision, perfect for creating the clean pilot holes needed for your blind brackets. An impact driver, on the other hand, is a powerhouse for driving long, heavy-duty screws into timber. It can be too aggressive for blind installation, risking damage to the screw heads or brackets. Our advice is simple: a good 18V cordless drill is your best mate for this project.
Understanding Drill Bits
Your drill is only as good as the bit you put in it. Choosing the right one comes down to what you’re drilling into. For most blind installations, you’ll only need one of these three types:
- Twist Bits: These are your all-rounders, perfect for drilling into timber or metal window frames like aluminium. They have a sharp, pointed tip and are the most common bits you’ll find.
- Masonry Bits: If you’re mounting your blinds on a brick, concrete, or tiled wall, you absolutely need one of these. You can spot them by their distinct, tough arrowhead-shaped tip, designed to hammer and cut through hard surfaces.
- Spade/Flat Bits: You’ll likely only need this for a specific task, like drilling a much larger hole to pass a cord through a frame. For standard bracket installation, you can leave this one in the toolbox.
A final pro tip: choose a cordless drill with an adjustable clutch (the ring of numbers behind the tip). This feature stops the drill from turning when the screw is tight, preventing you from stripping the screw head or cracking the plaster. It’s the secret to getting that secure, damage-free finish every time.
The Critical Step: Matching Your Tools to the Wall Surface
Right then, you’ve got your basic kit ready to go. But here’s the secret that separates a wobbly, amateur job from a secure, professional-looking installation that’ll last for years: matching your fixings to your wall surface. The type of screw and wall plug you use is completely dependent on what your wall is made of. Getting this right is the most important part of the job.
While your Aussie Online Blinds kit includes high-quality screws that work for most common situations, it pays to know what you’re drilling into. Let’s look at the three most common wall types you’ll find in Brisbane homes and the specific tools for installing blinds you might need for each.
Installing into Plasterboard (Drywall)
Plasterboard is common, but it’s too soft to hold a screw on its own. The best approach is to use a stud finder to locate the timber studs behind the plaster. Securing your brackets directly to a stud provides a rock-solid anchor point. If there’s no stud where you need a bracket, you’ll need high-quality plasterboard anchors, like self-drilling or toggle-style anchors, to grip the wall securely. Avoid common mistakes by reading our complete DIY installation guide.
Installing into Timber or a Steel Lintel
This is the easiest surface to work with, hands down. If you’re mounting your blinds onto a timber window frame or a timber stud, you can screw the brackets directly in. A great tip is to drill a small ‘pilot hole’ first-this is a hole slightly smaller than your screw-which stops the wood from splitting and makes driving the screw in much easier. For the steel lintels often found above windows, simply switch to ‘self-tapping’ metal screws for a secure fit.
Installing into Brick or Concrete
For solid brick or concrete walls, you’ll need a bit more grunt. Your standard drill won’t cut it; you’ll need a drill with a hammer function to power through the masonry. This job also requires specific hardware. The process is simple:
- Drill a hole using a masonry drill bit that matches the size of your wall plug.
- Gently tap the plastic wall plug (or masonry plug) into the hole until it’s flush with the wall.
- Position your bracket over the hole and drive the screw directly into the plug for a super-strong hold.
Pro-Level Tools and Safety Gear for a Flawless Finish
Alright, you’ve got the basics sorted. Now, if you’re looking to take your DIY game to the next level and get that truly professional, seamless finish, a few extra tools can make all the difference. These aren’t strictly essential, but they turn a good job into a great one, saving you time and guaranteeing accuracy. More importantly, we’ll cover the safety gear that is absolutely non-negotiable-because looking after yourself is the most important part of any project.
Tools That Make Life Easier
Think of these as your secret weapons for a perfect installation. They’re the handy bits and pieces that speed up the process and remove any guesswork, helping you get your beautiful new blinds up on the wall with complete confidence.
- Laser Level: A spirit level is good, but a laser level is brilliant. It projects a perfectly straight line across multiple windows, ensuring all your blinds line up flawlessly-a must for achieving that polished look in a big open-plan living area.
- Stud Finder: Stop playing “tap and guess” with your walls. An electronic stud finder quickly locates the timber studs behind plasterboard, giving you the most secure anchor point possible. It’s a huge help for heavier blockout blinds.
- Small Vacuum/Dustpan: A simple tip, but a game-changer. Keep a handheld vac or a dustpan and brush nearby to clean up drilling dust immediately. It stops mess from spreading through your home and makes the final cleanup a breeze.
Essential Safety Equipment
This part is not optional. The right safety gear protects you and your home, ensuring your installation is a stress-free success from start to finish. Don’t even think about starting without these items on hand.
- Safety Glasses: When you’re drilling, especially above your head, dust and small particles can easily fall straight into your eyes. A simple pair of safety glasses is a must-have for every DIYer.
- Gloves: A good pair of work gloves provides a much better grip on your drill and protects your hands from any sharp edges on brackets or screws.
- Sturdy Step Ladder: Please, never use a wobbly chair or a stool. A proper, stable step ladder is the only safe way to work at height. Always make sure it’s placed on level ground before you climb.
Having the right gear on hand makes the entire installation process smoother and more satisfying. The best tools for installing blinds aren’t just about drills and screwdrivers; they’re also about ensuring a secure fit and keeping yourself safe. Once you’re kitted out, you’re ready to achieve that flawless, factory-direct finish you’ve been dreaming of.
This principle of using precisely calibrated tools for accuracy and safety extends far beyond home DIY. In many Australian industries, for instance, equipment like force gauges requires expert calibration to ensure products meet strict quality standards. If you’re interested in the professional side of tool maintenance, you can learn more about Independent Scale Service and their role in industrial accuracy.
This same principle of using specialist tools and expertise applies to other valuable possessions. While you can confidently tackle your blinds with this guide, more intricate items often require a specialist’s touch. For delicate repair work on treasured pieces, for example, a dedicated service like Atoz Watch And Jewellery Repairs ensures they get the expert care they deserve.
Similarly, when it comes to personal health and achieving a confident smile, the expertise of a professional is irreplaceable. For those in the Sydney area looking for expert care, the team at Midway Dental Clinic has been a trusted choice for over two decades.
What’s in the Box? Getting Started with Aussie Online Blinds
You’ve gathered your essential toolkit, and now you’re ready for the final step. The good news? We’ve handled all the tricky parts for you. At Aussie Online Blinds, we believe installing your own blinds should be a rewarding, straightforward experience. That’s why every custom-made blind we ship comes packed with all the specific mounting hardware you’ll need. You just need to bring the basic tools for installing blinds we’ve outlined, and we’ll provide the rest.
Hardware We Provide
Forget making extra trips to the hardware store or guessing which screws to use. We take the stress out of the equation by including everything required to get your blinds on the wall and looking fantastic. Your order is the first step, so get started by learning how to measure your windows correctly. Once your custom blinds arrive, here’s what you’ll find inside:
- Custom-Fit Mounting Brackets: Each bracket is perfectly designed for your specific blind type, whether it’s a Roller, Venetian, or Roman blind. No one-size-fits-all nonsense here.
- High-Quality Fasteners: We include a set of durable screws and universal wall plugs suitable for most common applications in Brisbane homes, including timber frames and masonry walls.
- Easy-to-Follow Installation Guide: A detailed, step-by-step guide written in plain English, tailored specifically to the product you’ve ordered to ensure a seamless installation.
Ready to Start Your Project?
With your toolkit and our all-inclusive hardware pack, you have everything you need for a professional-quality finish. You can tackle this project with complete confidence, transforming your space in just an afternoon. Imagine the satisfaction of a job well done, not to mention saving hundreds of dollars on professional installation fees.
This principle of having the right kit for a high-quality result applies to many passion projects, from home renovation to automotive upgrades. Just as a complete hardware pack makes this job easier, car enthusiasts rely on specialists for their own performance projects. For those who apply the same DIY dedication to their vehicles, experts like ANTZ Performance are a go-to source for reliable parts and conversion kits.
The principle of using the right equipment to save money and achieve a better result extends beyond home projects. In industrial sectors, for example, choosing the right automation components can lead to significant savings on energy and operational costs. For those interested in how this applies in a business context, you can learn more about InstroDirect.
And if you do hit a snag, remember our friendly, Brisbane-based support team is just a phone call away. We’re locals, and we’re here to help you succeed. Ready to give it a go?
Explore our full range of Australian-made DIY blinds today!
You’re All Set for a Flawless Finish
Getting your windows looking sharp is easier than you might think. The secret is simply having the right gear on hand. From a trusty tape measure and spirit level to choosing the correct drill bit for your specific wall type, you now have a complete understanding of the essential tools for installing blinds. Mastering these basics is your ticket to a secure, professional-looking result every single time.
To make things even simpler, we’ve got your back. When you choose your premium, custom-made blinds from us, we include all the necessary mounting hardware right in the box. As a proud Australian family-owned and operated business, we stand by our quality with a comprehensive 3-Year product warranty, giving you complete peace of mind for your DIY project.
Ready to put your new knowledge into action? Find your perfect, easy-to-install blinds here! You’ve got the confidence and the checklist-a stunning new look for your home is just a weekend away.
Frequently Asked Questions About Installing Blinds
Do I need a drill to install blinds?
Yes, a drill is pretty much essential for a clean and secure installation. It makes creating pilot holes for your screws an absolute breeze, preventing timber window frames from splitting and ensuring your brackets are firmly attached. While you could technically tackle it with just a screwdriver, a cordless drill will save you a heap of time and elbow grease. It’s a key tool for a professional-looking finish that will last for years to come.
What kind of drill bit is best for installing blinds?
The right drill bit depends entirely on what your window frame is made of. For most timber frames here in Brisbane, a standard wood drill bit that’s slightly smaller than your screw shank is perfect. If you’re mounting onto an aluminium frame, you’ll need a specific high-speed steel (HSS) bit. For brick or masonry walls, grab a masonry bit and use the hammer function on your drill. Matching the bit to the surface is crucial for a secure fit.
Do new blinds come with all the necessary screws and brackets?
You bet! When you order your custom-made blinds from Aussie Online Blinds, we supply all the essential hardware for a standard installation, including the correct brackets and screws for your product. This ensures a perfect fit. Keep in mind, if you’re mounting onto a surface like plasterboard or brick, you may need to grab specific wall plugs or anchors from your local hardware shop. We cover the basics for a typical timber frame install.
How do you install blind brackets on a plasterboard or drywall wall?
Great question! Plasterboard isn’t strong enough on its own to hold a blind’s weight, so you’ll need special fasteners. We recommend using high-quality plasterboard anchors, sometimes called wall plugs or toggles. Simply drill a pilot hole, insert the anchor, and then screw your bracket into it. The anchor expands behind the wall, creating a super-strong fixing point. Never screw directly into plasterboard without one, as your blinds could easily pull away from the wall.
Can I install blinds myself without a professional?
Absolutely! That’s the beauty of ordering with Aussie Online Blinds. We design our products specifically for easy DIY installation. With a few basic tools for installing blinds and our straightforward instructions, most homeowners can get a professional-looking result in no time. It’s a rewarding weekend project that not only transforms your space but also saves you a bundle on professional installation fees. You’ve got this!
What’s the most important tool for ensuring my blinds are level?
While a tape measure is crucial for placement, a spirit level is the undisputed champion for a perfectly straight finish. After you’ve marked your bracket positions, hold them up and place the spirit level across them before drilling any final holes. This simple check ensures your blind won’t hang on an angle. A crooked blind is easily noticeable, so this is one step you definitely don’t want to skip for that polished, professional look.
Is it better to mount blinds inside or outside the window frame?
This choice often comes down to your window’s structure and your style preference. An inside mount, fitted within the window recess, provides a neat, integrated look that highlights your architraves. An outside mount, fixed to the wall or frame above the window, is a great solution if the recess is too shallow or has obstructions. It also provides better light blockage and privacy, as the blind can overlap the entire window opening.