

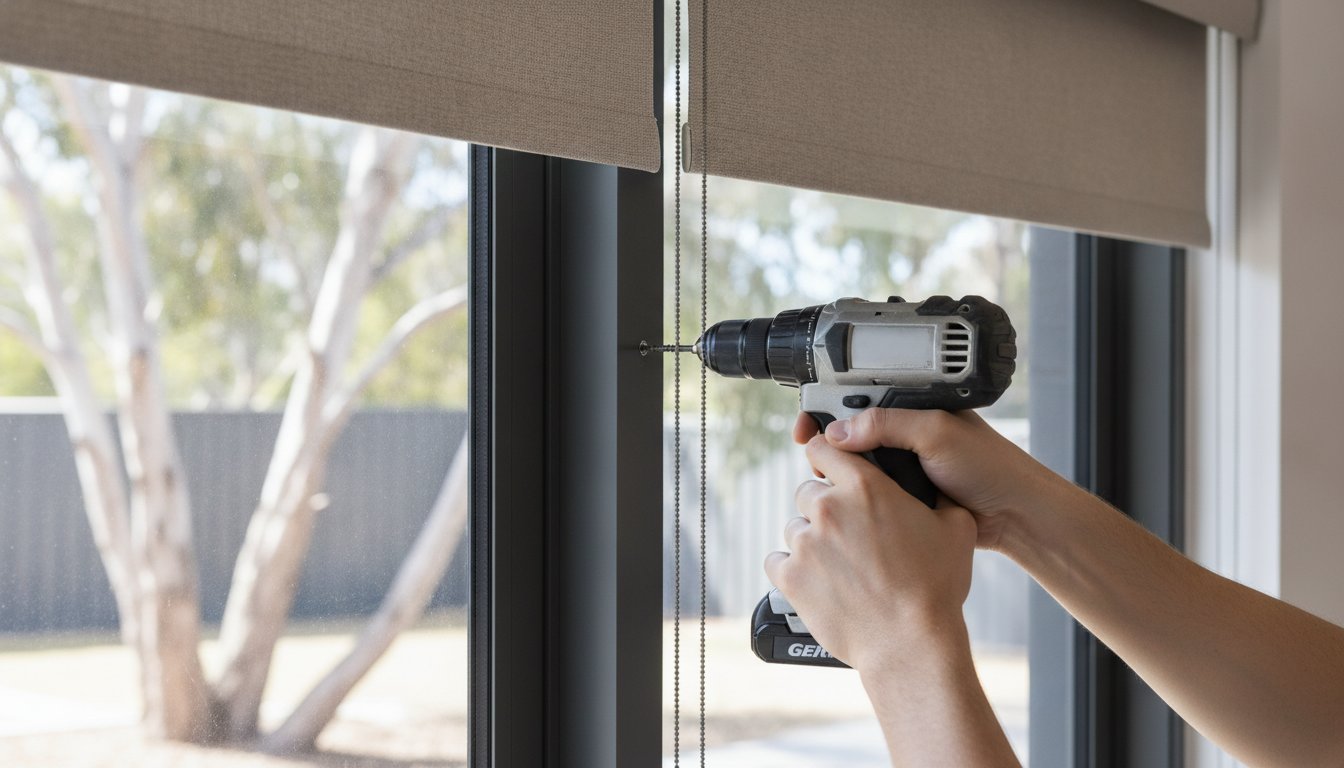
Success when installing blinds into metal frame isn’t about how hard you push, but how well you understand the chemistry between your drill bit and the steel. Most homeowners feel a bit of a shiver when they think about drilling into their expensive aluminium or steel frames. You’re likely worried about snapping a drill bit or, worse, leaving a permanent, ugly hole in the wrong spot. It’s a natural concern when you’re working on the bones of your home, but we’re here to tell you that a professional, secure finish is well within your reach.
We promise to demystify the process, turning that DIY anxiety into the confidence of a seasoned pro. This guide will walk you through the essential tools and techniques needed to achieve a perfectly level installation without damaging your window structure. We’ll cover everything from selecting the right self-tapping screws to the simple drilling methods our Brisbane team swears by. You’ll learn exactly how to handle your tools to ensure your new custom blinds look stunning and stay put for years to come.
Key Takeaways
- Learn to identify the difference between hidden lintels and exposed steel frames to avoid broken drill bits and frustration.
- Discover why a variable-speed drill and high-quality bits are the secret to successfully installing blinds into metal frame with total precision.
- Master the “Center Punch” technique to stop your drill from wandering and ensure your blind brackets are perfectly level and secure.
- Gain professional tips for mounting Zipscreen and outdoor blinds onto the heavy-duty structural steel posts found in Australian outdoor living areas.
- See how custom-measured blinds simplify the DIY process, providing you with the exact hardware and fit needed for a high-end finish.
Identifying Your Metal Frame: Hidden Lintels vs. Exposed Steel
Before you pick up your drill, you need to know exactly what’s waiting behind your window finish. In most Australian homes, you’ll encounter one of two scenarios. You’re either looking directly at an exposed aluminium or steel frame, or you’re drilling into a plasterboard reveal that has a heavy-duty steel lintel hiding just a few millimetres inside. Knowing which one you’re dealing with is the first step toward a successful project. While a Window blind overview shows that blinds can be mounted to almost any surface, installing blinds into metal frame requires a specific set of rules compared to timber or masonry.
Many DIYers run into trouble because they assume they’re drilling into brick or wood. If you try to use a standard masonry bit on a steel support beam, the bit will likely overheat and turn blunt within seconds. Masonry bits are designed to pulverise stone through impact, but metal requires a sharp edge to cut through the material. Whether you’re working with lightweight aluminium window tracks, sturdy Colorbond structures, or thick structural steel, identifying your material early saves your tools and your patience.
The ‘Warning Signs’ of a Hidden Metal Lintel
If you’re mounting your blinds inside a window recess, you might think you’re just dealing with plaster and timber. However, modern Australian construction often uses steel lintels to support the weight of the bricks above the window. You’ll know you’ve hit one if your drill suddenly meets heavy resistance after the first 10 to 15mm of easy going through the plasterboard. Instead of seeing grey masonry dust or wooden splinters, you’ll notice fine, curly silver shavings falling from the hole. Listen for a distinct, high-pitched ‘clinking’ sound as the drill bit makes contact. This is your cue to stop and swap to a metal-specific drill bit before you damage your equipment.
Exposed Metal Frames: Windows and Patios
Exposed frames are much more straightforward because you can see exactly what you’re working with. Aluminium window tracks are the most common interior metal surface. These are generally thin and quite soft, making them the easiest metal surface for installing blinds into metal frame. You won’t need much pressure here; just a steady hand and the right screw.
If you’re in the process of upgrading your home and need high-quality window or door frames, you can check out Prime Aluminium Solution for custom designs that provide a perfect foundation for your window furnishings.
On the other hand, outdoor areas like patios or pergolas often feature structural steel posts or Colorbond beams. These materials are significantly tougher than window tracks. While they require a bit more effort to penetrate, mounting your blinds to these surfaces is often more secure than using timber. Steel doesn’t warp, rot, or expand like wood does in the harsh Australian sun. This makes it an ideal foundation for heavy-duty outdoor blinds, provided you use the right hardware to bite into the metal properly. If you are also looking to protect your outdoor roofing and drainage, a specialized system from Leaf Stopper can help maintain the integrity of your gutters and eaves.
The Essential Toolkit for Metal Blind Installation
Grab a coffee and clear some space on your workbench. Having the right kit is the difference between a five-minute job and a weekend-long headache. Most “all-purpose” drill sets you find at the local hardware store are great for timber, but they’ll struggle when installing blinds into metal frame. You need precision tools that can handle heat without losing their edge. If you try to force a dull bit through steel, you’ll only end up with a ruined frame and a broken heart.
A variable-speed drill is your best friend for this project. If you spin a bit too fast on steel, it creates intense friction, gets hot, and loses its hardness. Slow and steady pressure is the key to cutting through metal rather than just rubbing against it. You’ll also need a fine-tip permanent marker or a center punch. A pencil mark often disappears on shiny aluminium, and you need a clear target to keep your installation level and professional.
Safety gear is non-negotiable. Put on your eye protection before you even touch the trigger. When you drill into metal, you aren’t creating dust; you’re making tiny, razor-sharp spirals of hot steel. These shards can fly anywhere, and they’re particularly fond of landing where they shouldn’t. Keep your workspace tidy and your eyes covered to ensure the only thing getting pierced is the frame.
Maintaining the structural and mechanical integrity of your home requires the same attention to detail as caring for your car. If you’re a hands-on homeowner who also handles your own vehicle repairs, you can visit Ozi Auto Parts for specialized mechanical components like brake systems and driveshafts that are built to last.
Choosing the Right Drill Bits: HSS vs. Cobalt
High-Speed Steel (HSS) bits are your go-to for aluminium window tracks. They’re affordable and cut through soft metals easily. But if you’re tackling those structural lintels we identified earlier, Cobalt bits are the gold standard. They contain a percentage of cobalt that keeps them hard even when they get hot. If your bit starts turning a blueish hue or stops producing curly metal shavings, it’s “burnt.” At that point, it’s time to replace it rather than trying to force it through the metal.
Fasteners and Screws: What Actually Holds?
Your choice of screw determines if your blind stays up or comes crashing down. For thin aluminium window frames, self-tapping screws are fantastic because they drill their own pilot hole as they go. This saves time and reduces the risk of the drill bit slipping. For heavy-duty projects like outdoor blinds, we suggest pre-drilling and using metal-thread screws. These provide a much tighter grip in thicker steel posts. Never use standard timber screws; their thread pitch is wrong for metal and they won’t hold the weight securely over time. If you’re feeling a bit overwhelmed by the hardware aisle, remember that our DIY blinds kits come with high-quality components designed for a perfect fit.
Step-by-Step Guide: Installing Blinds into Metal
Now that your toolkit is ready, it’s time to get to work. Don’t rush this part. When you’re installing blinds into metal frame, accuracy is your best friend because you can’t just wood-putty over a mistake in steel or aluminium. Double-check your measurements one last time. It only takes a minute, but it saves the frustration of a bracket that doesn’t quite line up. We always suggest measuring twice and marking once to ensure your project goes smoothly from start to finish.
Marking and Prepping the Surface
Start by holding your brackets in place and marking the hole locations. A standard pencil might be hard to see on dark or glossy metal, so a fine-tip permanent marker is often a better choice. Once you have your marks, use the ‘Center Punch’ trick. Take a center punch or even a sturdy nail and give it a sharp tap with a hammer at each mark. This creates a small divot in the metal. This tiny dent is crucial because it keeps your drill bit from wandering across the frame when you start drilling. This precision is especially important for indoor roller blinds, where even a few millimetres of misalignment can affect how smoothly the fabric rolls up and down.
The Drilling Process: Slow and Steady
This is where the ‘Pilot Hole Principle’ comes in. Instead of trying to jump straight to the final hole size, start with a smaller bit, perhaps 2mm or 3mm. Set your drill to a low speed but apply firm, steady pressure. If you’ve got some 3-in-1 oil or even a bit of WD-40 in the shed, put a single drop on the tip of the bit. This lubrication reduces heat and keeps the cutting edge sharp for longer. The ‘breakthrough’ moment is that specific second when the drill bit finishes cutting and pops through the final layer of metal into the hollow space behind. Once your pilot holes are done, you can move up to the correct size for your screws if needed.
Securing the Brackets
When you’re ready to mount the hardware, start your screws by hand. This ensures the threads catch correctly without cross-threading, which can happen if you jump straight in with a power drill. Once they’re started, use a manual screwdriver for the final few turns. This gives you much better control and prevents you from over-tightening and stripping the hole in the metal. Before you click your blinds into place, run a cloth or your finger (carefully!) over the area to check for any metal burrs. These small, sharp leftovers from drilling can snag your blind fabric or scratch the finish if they aren’t wiped away. Taking these extra seconds ensures your installing blinds into metal frame project looks like it was done by a professional.
Pro Tips for Outdoor Steel and Heavy-Duty Frames
Many modern pergolas use hollow box sections. This is great news for you because you only need to drill through the outer wall to get a firm grip. However, if you hit a solid corner bracket or a reinforced section, you’ll need to drop your drill speed even further to prevent the bit from snapping. If you live near the coast, salt air is a constant threat to any exposed metal. Every hole you drill is a potential entry point for rust. We suggest applying a small bead of neutral-cure silicone or a quick spray of anti-corrosion zinc primer into the hole before you drive the screw home. This simple step protects your frame and keeps your installation looking professional for years.
Zipscreen and Deep Channel Considerations
When mounting zipscreen outdoor blinds, the side channels must be perfectly plumb. Even a slight tilt on a metal post can cause the fabric to jam or ripple as it moves. Use a long spirit level to check your vertical alignment before you start drilling. Since these systems are under high tension, you’ll need specialized metal fasteners that won’t pull out under wind load. If your frame has a Colorbond finish, be extra careful with your drill. A slipping bit can leave a nasty scratch that’s hard to hide, so take your time and let the tool do the work.
Troubleshooting: What if the Bit Breaks?
It happens to the best of us. If a drill bit snaps while you’re installing blinds into metal frame, don’t panic. If there’s enough of the bit sticking out, use a pair of vice-grips to twist it out. If it’s snapped flush, you might need to drill a new hole about 10mm away and adjust your bracket position slightly. If you accidentally strip a screw hole, don’t try to force the screw to hold. You can either move up to a slightly larger gauge screw or use a sturdy rivet to secure the bracket. If you ever feel stuck, you can always contact our team for expert advice on your specific project. We’ve seen every type of frame imaginable and are happy to help you get your DIY project back on track.
Why Custom DIY Blinds are the Best Choice for Metal Frames
Choosing the right product is just as important as the installation itself. When you’re installing blinds into metal frame, there’s zero room for error. Metal doesn’t hide mistakes like timber does. This is why diy blinds that are custom-manufactured to your exact measurements are the only way to go. Off-the-shelf options rarely fit perfectly. Trying to force a standard size into a metal recess is a recipe for frustration. By choosing a custom solution, you ensure that every bracket lines up exactly where it should, making the whole process of installing blinds into metal frame much smoother.
You’ll also find that taking the DIY route puts a significant amount of money back in your pocket. Professional installation services often add a hefty surcharge for drilling into steel or aluminium because it requires specialized bits and more time. By following our guide and using the high-quality hardware we provide, you can achieve a professional result without the professional price tag. We include components that are specifically chosen to stand up to the rigours of the Australian climate, from the scorching Brisbane sun to coastal salt spray. This ensures your investment stays secure and functional for years to come. To see how professionals handle custom fits and high-end materials, you can discover Miller’s Window Works and explore their approach to premium window treatments.
The Aussie Online Blinds Difference
As a family-owned business, we understand exactly what Australian homes need. We don’t just sell you a product and leave you to it; we’re your partners in this journey. Our products come with a 3-year warranty, giving you peace of mind that your investment is protected. We also provide extensive blind maintenance resources to help you keep your new window furnishings looking like new. Our hardware is engineered for durability, ensuring that whether you’re mounting indoor rollers or heavy-duty outdoor screens, the fit is secure and the operation is flawless.
Getting Started with Your Project
Ordering your custom blinds online is a straightforward process designed with your success in mind. Simply follow our measuring guides to get your dimensions right, and we’ll take care of the rest, manufacturing your blinds to your specific requirements. We’ve demystified the technical side so you can focus on the style and comfort of your home. You’ll receive everything you need for a successful install, backed by the expertise of a team that knows Australian building standards inside and out. Ready to upgrade? Browse our range of custom-made blinds today and see how easy it is to transform your space with confidence.
Take Charge of Your Home Style Today
You’ve now got the expert knowledge to tackle any steel or aluminium frame in your home with total confidence. By mastering the “slow and steady” drilling technique and choosing the right Cobalt bits, you’ve turned a potentially stressful task into a straightforward weekend win. Success when installing blinds into metal frame starts with those precision measurements we discussed and ends with the satisfaction of a perfectly level finish. You don’t need to hire a professional when you have the right guidance and high-quality hardware at your fingertips.
As an Australian family-owned business, we’re proud to support your project with custom-made products and reliable Australia-wide shipping. Every blind we manufacture comes with a 3-year warranty, giving you peace of mind that your new look is built to last. It’s time to stop worrying about your window frames and start enjoying the comfort of your upgraded space. Explore our range of custom DIY blinds designed for easy installation and get your next project moving today. We can’t wait to see what you achieve!
Frequently Asked Questions
Can I install blinds into a metal frame without drilling?
You generally cannot achieve a secure, long-term installation on a metal frame without drilling. While some temporary tension rods or adhesive hooks exist, they aren’t strong enough to support the weight of custom roller blinds or handle the daily operation of outdoor systems. Stick-on options often fail under the intense Australian sun. Drilling ensures your blinds stay exactly where you put them, providing safety and reliability for years.
What is the best drill bit for a metal window lintel?
Cobalt drill bits are the superior choice for structural steel lintels found in most modern Australian homes. These bits are specifically designed to handle the high heat generated when cutting through thick steel support beams. While standard High-Speed Steel (HSS) bits work well for thin aluminium window tracks, they’ll likely blunt or snap when hitting a heavy-duty lintel. Investing in a quality cobalt bit saves you time and tool costs.
Will drilling into my aluminium window frame void my warranty?
Do I need special screws for installing blinds into a metal frame?
Yes, you must use metal-specific fasteners like self-tapping screws or metal-thread screws for a secure fit. Timber screws have a different thread pitch and won’t grip the metal, which leads to a loose and potentially dangerous installation. Using the right hardware ensures your installing blinds into metal frame project is safe and durable. We include high-quality, surface-appropriate hardware in our custom kits to take the guesswork out of your DIY journey.
How do I stop my drill bit from slipping on the metal surface?
Creating a small physical divot with a center punch or a sturdy nail is the most effective way to stop a bit from skidding. Place the tip on your mark and give it a sharp tap with a hammer to create a tiny “dimple.” This gives the drill bit a fixed point to sit in, ensuring your hole is exactly where you want it. This simple step prevents ugly scratches on your expensive aluminium or steel frames.
What happens if I hit a metal lintel while drilling into my wall?
You should stop immediately and swap your masonry bit for a metal-cutting cobalt bit. Continuing to use a masonry bit on steel will only generate extreme friction and ruin the bit without making progress. Once you’ve cleared the steel support beam with the correct metal bit, you can return to your masonry bit if you need to go deeper into brickwork. This swap is a common part of Australian DIY installs.
Can I use self-tapping screws for outdoor Zipscreen blinds?
Self-tapping screws are suitable for many aluminium posts, but for high-tension systems like Zipscreen, we often recommend pre-drilling and using heavy-duty metal-thread screws. This provides a much more robust anchor against the heavy wind loads common in Australian outdoor areas. Since outdoor blinds are larger and heavier, the extra grip provided by a metal-thread screw offers better long-term security. Always ensure your fasteners are made of stainless steel to prevent rust.
Is it harder to install blinds into metal than into timber?
It isn’t necessarily harder; it just requires a different approach and a bit more patience. While timber is more forgiving of minor errors, installing blinds into metal frame provides a more stable and permanent mount that won’t warp or rot over time. Once you have the right cobalt bits and a center punch, the process is very logical. Most of our customers find that the precision of metal actually makes for a cleaner, more professional finish. If you are planning broader property upgrades involving high-performance aluminium windows or structural rooflights, you can visit View Glazing to explore specialist options and design inspiration.