

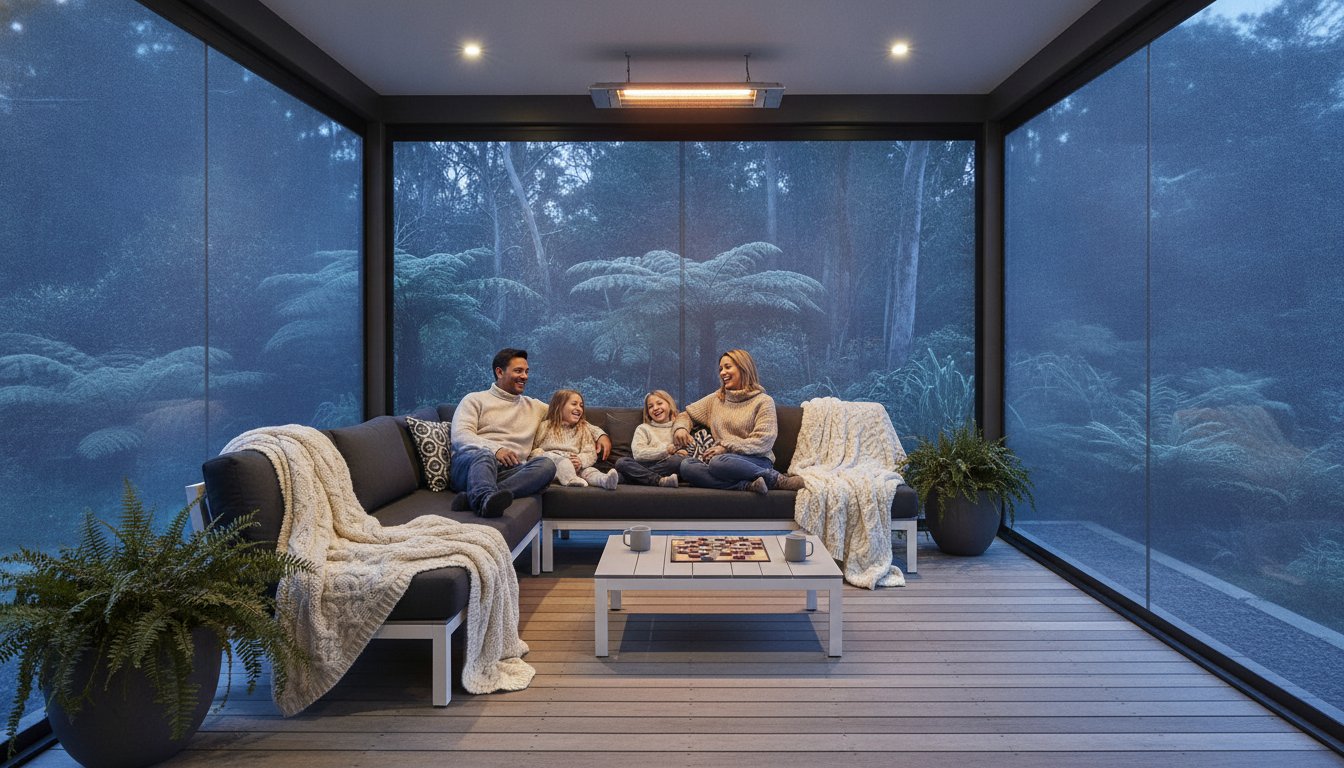
Most homeowners believe a bigger heater is the only way to survive a July cold snap, but even the most powerful fire can’t compete with a freezing southerly wind. It’s disheartening to watch your deck go to waste for a quarter of the year because the rain won’t stay out. You probably want that cosy, year-round entertaining space, but the high cost of professional enclosures often puts the dream out of reach.
We’ve put together this guide on how to make your outdoor area usable in winter by focusing on smart, affordable DIY solutions that actually work. You’ll learn how to block the wind with professional-grade zipscreens, stay compliant with the latest 2026 fire safety standards, and trap every bit of warmth using structural weatherproofing. We’ll walk you through the practical steps to transform your patio into a weatherproof sanctuary that feels just as comfortable as your lounge room. Discover how to reclaim your space and protect your furniture without the need for expensive contractors.
Key Takeaways
- Identify the “heat leeches” in your current deck design and learn why wind chill is the biggest barrier to winter comfort.
- See how custom outdoor blinds act as a second skin for your home, trapping a layer of warm air to keep the frost at bay.
- Master the secrets of how to make your outdoor area usable in winter by choosing radiant heating over convection for better efficiency.
- Create a warm atmosphere with heavy-weight, mould-resistant textiles and lighting choices that influence the psychology of comfort.
- Save on professional fees by opting for high-quality DIY solutions that provide a bespoke look without the middleman markups.
Why Your Outdoor Area Feels Unusable in Winter
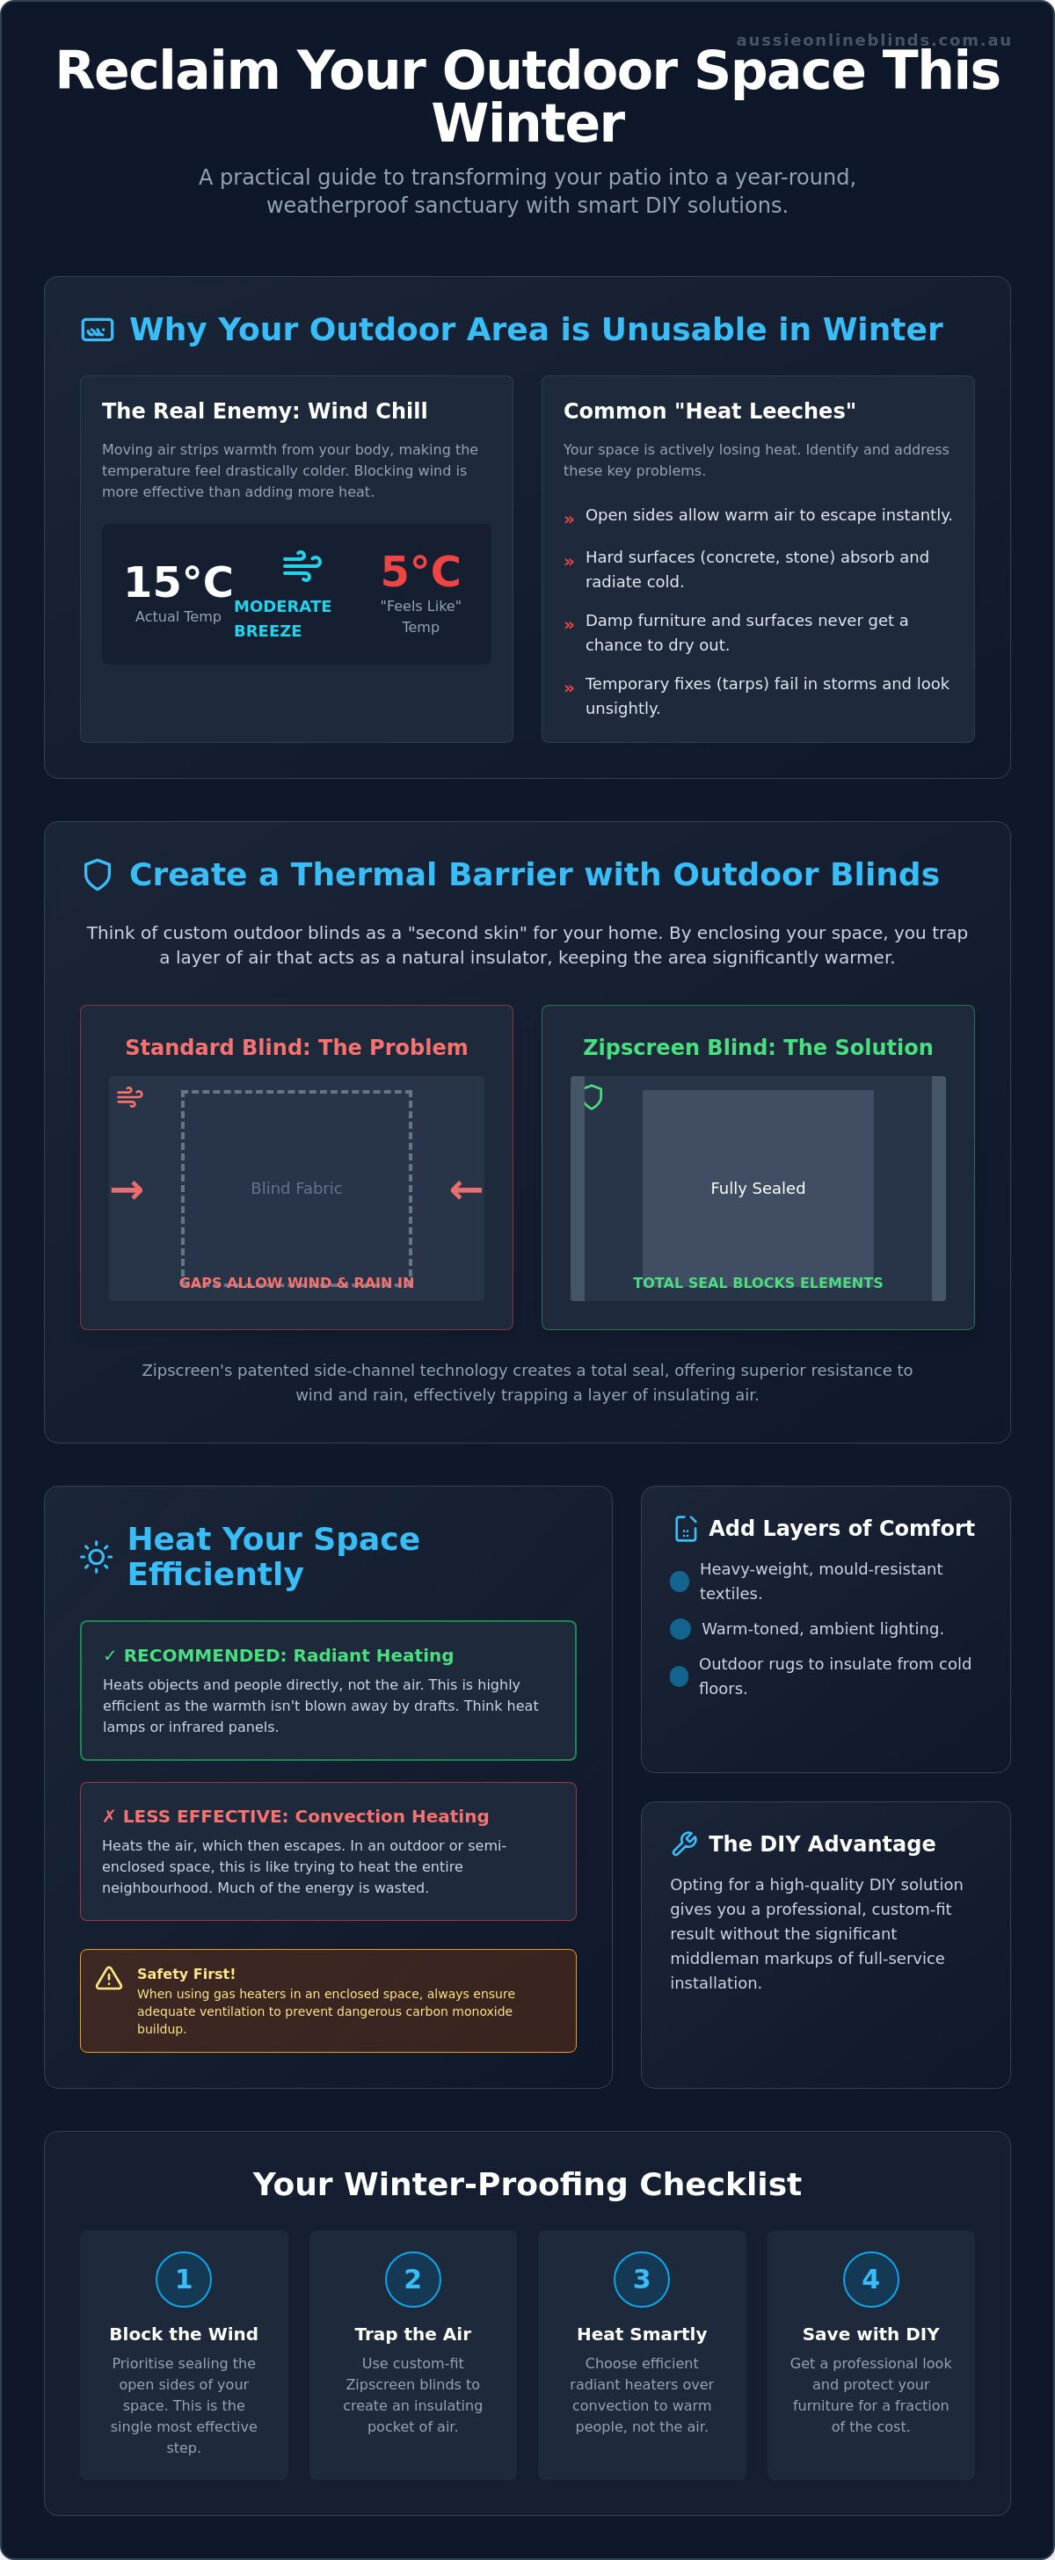
Many Australians look out at their deck in June and see a wasted opportunity. It’s not just the low temperature that keeps us inside; it’s the combination of biting winds and damp surfaces. When you’re researching how to make outdoor area usable in winter, you first need to identify the “heat leeches” stealing your comfort. Open sides are the biggest culprits, allowing every bit of warmth to escape instantly through convection. Hard surfaces like concrete floors or stone pavers also act as thermal sinks, absorbing the cold from the ground and radiating it back at your feet, making even a covered deck feel like an ice box.
The frustration often peaks when you notice rain-splattered furniture and damp cushions that never seem to dry out. A few throw rugs and a small fire pit might look nice on social media, but they rarely solve the underlying problem. To achieve true What is thermal comfort?, you have to address how your environment interacts with the elements. Simply adding decor isn’t enough to combat a wet Aussie winter; you need a strategy that actually manages the airflow around your home.
Wind vs. Temperature: The Real Winter Enemy
Moving air is the fastest way to lose body heat. While a 15-degree day sounds manageable, a moderate breeze can make it feel closer to 5 degrees on an exposed deck. This process strips the warm layer of air away from your skin. That’s why blocking the wind is often more effective than turning on a high-powered heater. By sealing off the sides of your patio, you create a “dead air” space. This trapped air acts as a natural insulator, making it much easier to maintain a stable, comfortable temperature without wasting energy. Understanding this scientific principle is the first step in how to make outdoor area usable in winter.
The Limitations of Temporary Solutions
It’s tempting to reach for cheap fixes like plastic tarps or thin sheets to block the rain. However, these temporary solutions usually fail the moment a real storm hits. They flap loudly in the wind, tear easily, and often look like a construction site rather than a home. Worse still, many homeowners take safety risks by bringing indoor gas heaters into semi-enclosed spaces, which can lead to dangerous carbon monoxide buildup. Truly discovering how to make outdoor area usable in winter requires a structural mindset. You don’t need a full renovation, but you do need professional-grade materials that can withstand the pressure of a winter gale while keeping your family safe and warm. This is about creating a permanent feeling of comfort without the permanent price tag of a glass sunroom.
Creating a Thermal Barrier with Outdoor Blinds
While a fire pit adds atmosphere, the real secret to how to make outdoor area usable in winter is stopping the heat from escaping. Think of outdoor blinds as a “second skin” for your home. By enclosing your patio or deck, you create a physical barrier that prevents the warm air you’ve generated from being whisked away. This isn’t just about blocking rain; it’s about the science of heat retention. When you lower your blinds, you trap a stagnant layer of air inside. This layer acts as an invisible cushion of insulation, keeping the space significantly warmer than the exposed garden outside.
Choosing the right fabric is a balancing act. You want to block the biting breeze, but you likely don’t want to lose your view. A tighter weave provides better thermal protection, while a slightly more open mesh maintains that connection to your backyard. However, even the best fabric won’t work if there are gaps. Cold air is persistent; it will find any opening around the edges of a standard blind. When considering how to make outdoor area usable in winter, remember that a custom-fit solution is vital. By tailoring the blinds to your exact measurements, you eliminate those icy draughts that can ruin a quiet evening.
Zipscreen Outdoor Blinds: The Gold Standard for Winter
If you’re serious about weatherproofing, zipscreen outdoor blinds are the top choice for Australian conditions. Unlike traditional blinds that may flap or leave side gaps, Zipscreens use a clever side-track technology. The fabric is zipped into the side channels, creating a total seal from top to bottom. This design offers impressive wind resistance and ensures that rain stays on the outside. Because they create such an effective seal, it is important to follow carbon monoxide safety guidelines when using gas heaters in your newly enclosed space. Always ensure there is adequate ventilation to keep your family safe while they stay warm.
Alternative Options: Pivot Arm and Deep Channel Blinds
For areas where a total seal isn’t required, pivot arm blinds are a great alternative. They allow for excellent airflow control, which is handy on those milder winter afternoons. If you’re looking for a simpler way to block the weather, deep channel blinds provide a sturdy track system that keeps the fabric secure without the full zip-lock mechanism. Whether you prefer a manual crank or the convenience of motorised operation, these options are essential for how to make outdoor area usable in winter. If you’re ready to start your project, you can browse our full range of DIY blinds to find the perfect fit for your home.
Heating Your Outdoor Area Efficiently
Once you’ve sealed the edges with high-quality blinds, the next step in how to make outdoor area usable in winter is choosing a heat source that actually reaches you. Most homeowners don’t realise there’s a strict hierarchy to outdoor heating. You have two main choices: radiant heat and convection heat. Convection works by warming the air, which is a fantastic solution indoors but a total disaster on a patio. Even with a good enclosure, air can still circulate. Radiant heat, such as that from an infrared heater, travels in waves and warms objects directly. It’s like standing in the sun on a crisp morning; you feel the warmth on your skin even if the air around you is cold.
Attempting to heat an unenclosed space is essentially trying to warm up the entire neighbourhood. It’s a quick way to blow your budget for very little comfort. By using your blinds to create that dead air space we discussed earlier, your heaters only have to work half as hard. Position your heaters to overlap their warmth zones specifically over seating areas rather than walkways. This targeted approach keeps the heat where it’s needed most and prevents energy waste. Planning your layout correctly is essential when learning how to make outdoor area usable in winter.
Electric Infrared Heaters vs. Gas Patio Heaters
Electric infrared heaters are the 2026 standard for efficiency and performance. They provide instant, direct heat that isn’t easily blown away by a stray gust. While gas patio heaters offer the benefit of portability, they often come with higher running costs and require a constant supply of bottles. In 2026, the smartest move is to heat only when and where you’re sitting. Many modern electric systems now integrate with smart home sensors to ensure you aren’t warming an empty deck. Integrating these technologies is a key component of how to make outdoor area usable in winter efficiently, though for complex wiring and sensor setups, Inlightec Electrical Solutions can provide Western Australian homeowners with the professional expertise required for a safe installation.
The Ambience of Fire Pits
Fire pits are the soul of an Australian backyard, but they work best as a focal point rather than your primary heat source. If you choose a wood-burning pit, ensure it adheres to Australian Standard AS/NZS2918 for safety and clearance. Wood fires offer intense heat and a classic crackle, but you must manage the smoke so it doesn’t get trapped behind your blinds. Ethanol fire pits are a cleaner, smoke-free alternative for smaller spaces, though they provide less warmth. Think of the fire as the “vibe” that draws people together while your infrared heaters and blinds do the heavy lifting of keeping the space comfortable.
Adding Layers of Comfort: Textiles and Lighting
Once you have secured your perimeter and installed a reliable heat source, the final step in how to make your outdoor area usable in winter is addressing the sensory details. Structural changes handle the physics of warmth, but textiles and lighting handle the psychology of it. A space that looks cold will feel cold, regardless of what the thermometer says. By layering soft furnishings and adjusting your light levels, you can turn a functional patio into a genuine extension of your living room that invites you to linger even on the frostiest July nights. To truly replicate the comfort of an indoor lounge, you might also explore Professional Audio Systems from NextGen AV to integrate high-quality entertainment that complements your new weatherproofed environment.
This phase of the project is where you bridge the gap between “outside” and “indoors.” While we previously discussed how concrete and timber floors act as heat leeches, adding an outdoor rug provides a vital layer of insulation underfoot. It stops the cold from rising through the soles of your feet, which is often the primary reason people feel uncomfortable in an outdoor setting. Combined with the right lighting, these additions create a cohesive environment that feels protected and private.
Winter-Proof Textiles
Standard indoor cushions won’t survive a week in a damp Australian winter. To ensure your space remains low-maintenance, choose heavy-weight, mould-resistant fabrics such as solution-dyed acrylics. These materials are designed to handle high humidity without developing that musty smell. We suggest keeping a weather-proof storage box nearby for your heavy-duty throws and cushions during particularly rainy weeks. This keeps them crisp and dry for the next clear evening. Using outdoor rugs is also a practical way to prevent heat loss through the floor, creating a thermal break between the cold ground and your seating area.
Lighting for a Warm Atmosphere
The biggest mistake homeowners make is using “daylight” or “cool white” bulbs in their outdoor areas. These blue-toned lights feel clinical and physically colder. Instead, switch to warm white LEDs with a colour temperature of approximately 2700K. This mimics the soft, amber glow of firelight and immediately makes the space feel more intimate. Dimmable lights are a fantastic investment for 2026, allowing you to dial up the brightness for dining and lower it for a cosy nightcap. Festoon lights are another excellent tool; when hung at a lower height, they define the “ceiling” of your space, helping it feel more enclosed and secure.
To truly complete your winter sanctuary and ensure your new textiles stay protected from the elements, consider the benefits of high-quality outdoor blinds online. A proper enclosure ensures your rugs stay dry and your warm lighting isn’t lost to the darkness of the backyard.
The DIY Solution: Custom Blinds for a Fraction of the Cost
Many homeowners assume that achieving a high-end, weather-proof look requires hiring an expensive specialist. That just isn’t the case in 2026. Learning how to make your outdoor area usable in winter often leads people to realize that the biggest barrier isn’t the cold itself, but the perceived cost of professional enclosures. By choosing a DIY path, you’re getting the same professional-grade hardware and custom-manufactured fabrics used by contractors, but you’re cutting out the middleman and the hefty installation fees. This approach doesn’t mean you’re settling for a cheap look; it means you’re investing in quality materials rather than labor costs.
This smart approach to budgeting allows you to allocate funds to other essential areas of your life or business. For Australian entrepreneurs who want to ensure their savings are managed correctly, visiting asapsolutions.tax can help streamline your tax and accounting processes while you focus on home improvements.
There’s a unique sense of pride that comes with completing a project yourself. When you sit down on a rainy Saturday evening behind a set of blinds you installed, the space feels more like a personal achievement than just a renovation. Because these products are custom-made to your exact specifications, you aren’t trying to make a generic, off-the-shelf blind fit a unique space. You’re creating a tailored solution that looks and performs like a permanent room addition. Taking the DIY route is the most practical answer to how to make your outdoor area usable in winter without breaking the bank.
Measuring for a Perfect Winter Seal
To get that perfect winter seal, your measurements need to be spot on. A gap of even a few millimetres can let in a freezing draught that ruins your thermal barrier. You won’t need a shed full of specialized tools to get this right. A reliable steel tape measure, a spirit level, and a notepad are usually all it takes to get the job done. If you’re feeling a bit nervous about the process, check out our guide on how to measure for blinds online. It breaks down exactly where to measure so your new blinds fit like a glove and keep the wind out.
Ordering and Installing Your Outdoor Blinds
When you’re ready to order, think about the thermal properties of your fabric. Darker colours often absorb more heat from the sun during the day, while certain mesh weaves are better at cutting wind chill without blocking your view of the garden. Once your custom package arrives, the installation is often as simple as securing a few brackets and clicking the blinds into place. The final step is the most important for winter performance: tensioning. Ensuring your outdoor blinds are tensioned correctly prevents them from rattling in a storm and maintains that airtight seal you’ve worked hard to create. It’s the finishing touch that ensures your deck stays warm and dry no matter what the Australian winter throws at it.
Start Your Winter Transformation Today
Winter shouldn’t be a reason to lock the sliding door and stay inside. By focusing on blocking the wind and trapping warmth with a custom enclosure, you’ve already won the most important part of the battle. The real secret to how to make your outdoor area usable in winter isn’t just about adding heat; it’s about creating that essential thermal barrier and layering in the right textures and lighting for genuine comfort.
Taking the DIY route allows you to enjoy professional results without the contractor markup, giving you a space that’s ready for entertaining through every July cold snap. We’re a proud Australian family-owned business, and we’ve designed our high-quality Zipscreen technology to stand up to the local elements while being simple to install. Every custom blind comes with a 3-year warranty, so you can feel confident in your home improvement journey. You don’t need a professional team to get a high-end result. With your own measurements and our durable hardware, your deck will quickly become the most popular room in the house.
Design your custom winter enclosure today with Aussie Online Blinds and reclaim your outdoor lifestyle.
Frequently Asked Questions
Can outdoor blinds really keep a patio warm in winter?
Yes, they can significantly increase the temperature by trapping a layer of “dead air” that acts as a natural insulator. This barrier prevents the warm air from your heater from escaping and stops the wind from stripping away your body heat. When people ask how to make outdoor area usable in winter, we always suggest starting with the enclosure before the heater, as it ensures you aren’t wasting energy heating the garden.
What is the best type of heater for a semi-enclosed outdoor area?
Electric infrared heaters are the most effective choice because they provide radiant heat that warms people and objects directly. Unlike gas convection heaters, which try to warm the air, infrared waves aren’t as affected by moving air. This makes them perfect for spaces with outdoor blinds, as they provide instant comfort without the high running costs or safety risks associated with portable gas bottles in semi-enclosed spaces.
Do I need council approval to install outdoor blinds?
In most Australian jurisdictions, you don’t need council approval for standard outdoor blinds as they are considered non-permanent additions. However, if you’re installing a very large system or live in a heritage-listed area, it’s a good idea to check with your local council first. Generally, as long as the blinds don’t involve structural changes to the building’s footprint, you’re free to proceed with your project without a permit.
How do I stop condensation from forming on my outdoor blinds?
Condensation occurs when warm, moist air hits the cold surface of the blind, so maintaining a small amount of airflow is essential. You can reduce moisture buildup by leaving a tiny gap at the bottom or top of the blind to allow for natural ventilation. It’s also helpful to wipe down the fabric with a soft cloth if you notice heavy moisture, which prevents mould from developing during the wetter months.
Are Zipscreen blinds worth the extra cost for winter protection?
Absolutely, because the side-track technology creates a total seal that standard blinds simply can’t match. This seal is the most effective way to block icy draughts and keep rain from splattering your furniture. While the initial investment is higher, the durability and superior thermal performance make them the most reliable choice for anyone serious about year-round outdoor living in the Australian climate.
How do I maintain my outdoor blinds during the wet winter months?
Regular cleaning is the best way to keep your blinds in top shape, especially when the rain brings dust and debris. Use a soft brush and clean water to remove dirt, and try to avoid rolling up the blinds while they are soaking wet for long periods. If you must roll them up wet, make sure to extend them again as soon as the sun comes out so they can dry properly and stay crisp.
Can I install Zipscreen blinds myself as a DIY project?
Yes, our Zipscreen systems are specifically designed for straightforward DIY installation by homeowners. We provide custom-manufactured hardware that is cut to your exact measurements, making the process much simpler than most people expect. You’ll only need basic tools like a drill and a spirit level. By doing it yourself, you can save significantly on installation fees while still achieving a professional, high-end look that lasts for years.
What is the most energy-efficient way to heat a deck in Australia?
The most efficient strategy is combining a sealed enclosure with targeted infrared heaters that only run when the space is in use. By using outdoor blinds to create a protected zone, you significantly reduce the amount of energy required to reach a comfortable temperature. This approach ensures you’re only heating the people in the “warmth zone” rather than losing all your expensive heat to the open night air.