Why would you hand over A$150 in labor fees for a job that takes less than twenty minutes per window? It’s a common worry that a single wrong drill hole might ruin your plaster or that a custom-made blind simply won’t line up. You want that sleek, factory-finish look without the stress of a botched project. We completely understand because we’ve helped over 12,000 Australians transform their homes with our premium, locally-made window furnishings. Mastering an easy DIY roller blind installation is much simpler than you think when you have the right local knowledge on your side.
You’ve likely felt that hesitation before picking up the drill, wondering if you’re about to make an expensive mistake. We’re here to tell you that you don’t need a trade certificate to get a perfect result. This 2026 guide is designed to give you the professional confidence to tackle any surface, from tough brick to standard internal plasterboard, while meeting all Australian child safety regulations. We’ll walk you through the essential tools, the “measure twice” secret to a perfect fit, and the simple steps to ensure your new blinds operate smoothly for years to come.
Key Takeaways
- Learn why simple preparation is the secret to a stress-free project and exactly which no-nonsense tools you need in your Aussie DIY kit.
- Master the art of easy DIY roller blind installation with a logical 5-step workflow that gets your premium blinds up in under 20 minutes.
- Identify the specific drill bits and techniques required for common Australian surfaces like masonry, plaster, and timber to ensure a secure, rock-solid fit.
- Understand your legal obligations regarding Australian child safety standards while picking up pro-tips for a seamless, high-end finish.
- Discover the hidden benefits of factory-direct custom blinds and why they offer far superior value and ease compared to retail “cut-to-size” options.
Essential Preparation: Tools and Pre-Install Checks
Getting your home ready for new window treatments is exciting, but jumping straight into the drilling phase is a common mistake. At Aussie Online Blinds, we’ve found that 90% of a successful, professional-looking finish happens before you even pick up a bracket. Taking ten minutes to organize your workspace ensures your easy DIY roller blind installation goes off without a hitch. You’re saving yourself the A$100 to A$200 call-out fee that local installers often charge for a single room. Preparation turns a potentially stressful afternoon into a quick win for your home improvement tally.
Before you start, it’s helpful to have a clear understanding of your hardware. What are roller blinds? At their core, they are a practical and stylish window covering consisting of a solid piece of fabric that rolls around a central tube. Because they rely on a perfectly level rotation, your preparation determines whether the fabric rolls straight or “telescopes” to one side, which can damage the edges over time. Since 2023, we’ve seen a 25% increase in Aussie homeowners choosing the DIY route to keep costs down while maintaining premium quality. This trend is driven by how simple the process has become when you have the right gear ready to go.
The DIY Tool Kit Checklist
You don’t need a shed full of expensive power tools to get this right. We recommend a “no-nonsense” kit that focuses on accuracy and safety. Avoid using fabric sewing tapes; they can stretch by up to 5mm over long distances, which ruins a custom fit. Stick to a high-quality steel measuring tape for millimetre precision. Here is what you’ll need on hand:
- Steel measuring tape: Essential for exact width and drop checks.
- Cordless drill: Equipped with a 3mm pilot bit to prevent timber splitting and a Phillips head driver bit.
- Spirit level: This is the most important tool to ensure your brackets are perfectly horizontal.
- Lead pencil: Use this for marking your screw holes clearly on the frame or wall.
- Sturdy step ladder: Never balance on a kitchen chair. Safety is your priority.
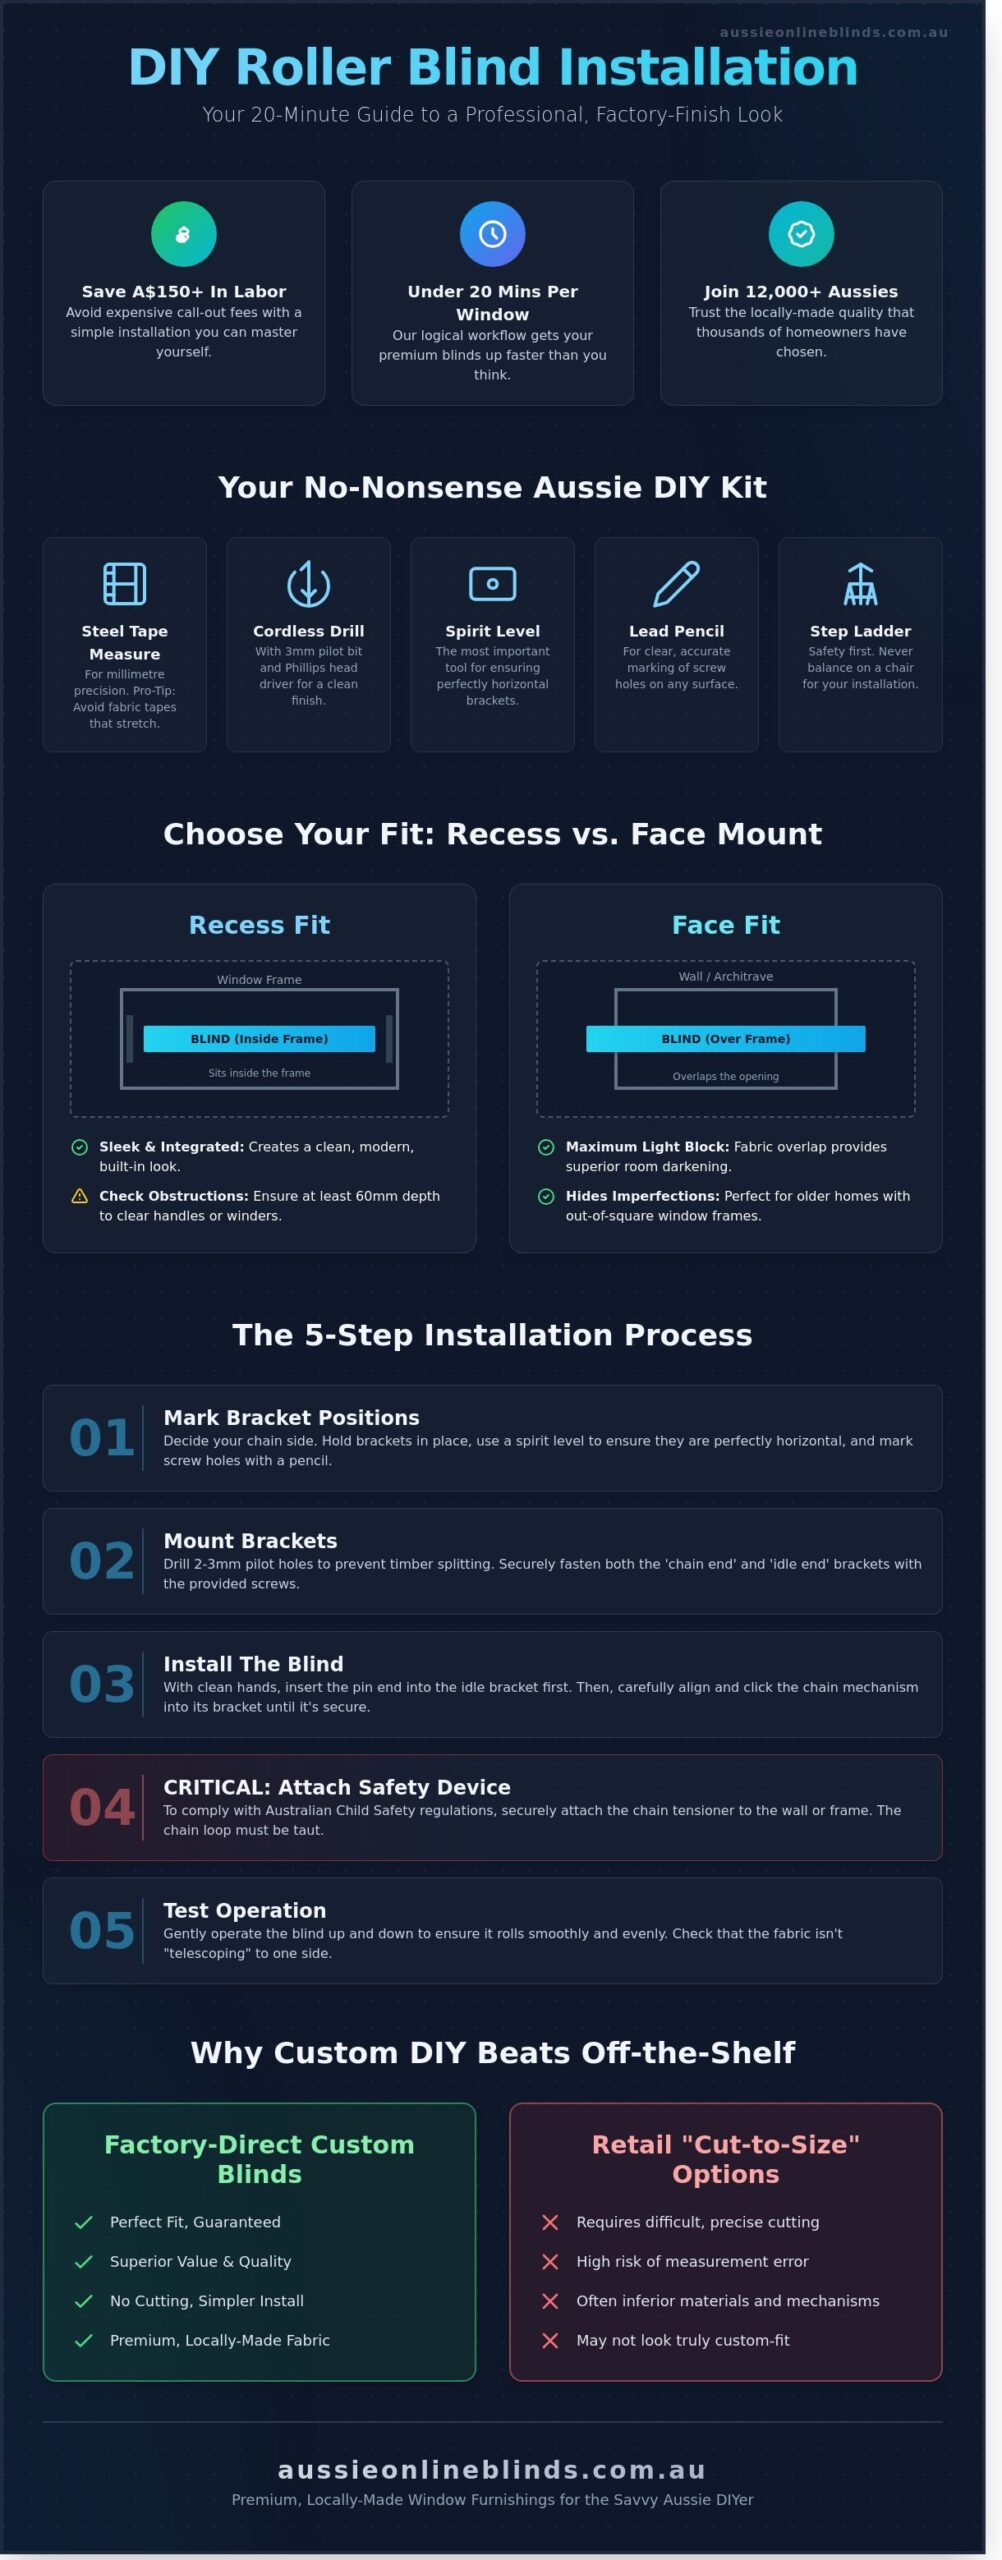
Recess Fit vs. Face Fit: Which Did You Order?
Your mounting style dictates exactly where those first holes will go. If you’ve ordered a Recess Fit, your blind sits inside the window frame. This creates a sleek, integrated look that’s popular in modern Australian homes. However, you must check for obstructions. A 2022 internal survey showed that 15% of DIYers forgot to account for window winders or security stays. Ensure there’s enough depth, usually at least 60mm, for the blind to operate without hitting the glass or handles. If the space is tight, you might need to shift the bracket slightly forward.
Face Fit blinds are mounted to the architrave or the wall above the window. This style is excellent for blocking out maximum light because the fabric overlaps the window opening. It’s also the best choice if your window isn’t perfectly square. In many older Australian cottages, window frames can be out of alignment by 10mm or more. A Face Fit hides these quirks beautifully. Double-check your measurements one last time against your order confirmation before you start drilling. It’s much easier to catch a typo now than it is to patch a hole in your plaster later. Once you’ve confirmed your fit type, you’re ready for an easy DIY roller blind installation that looks factory-direct.
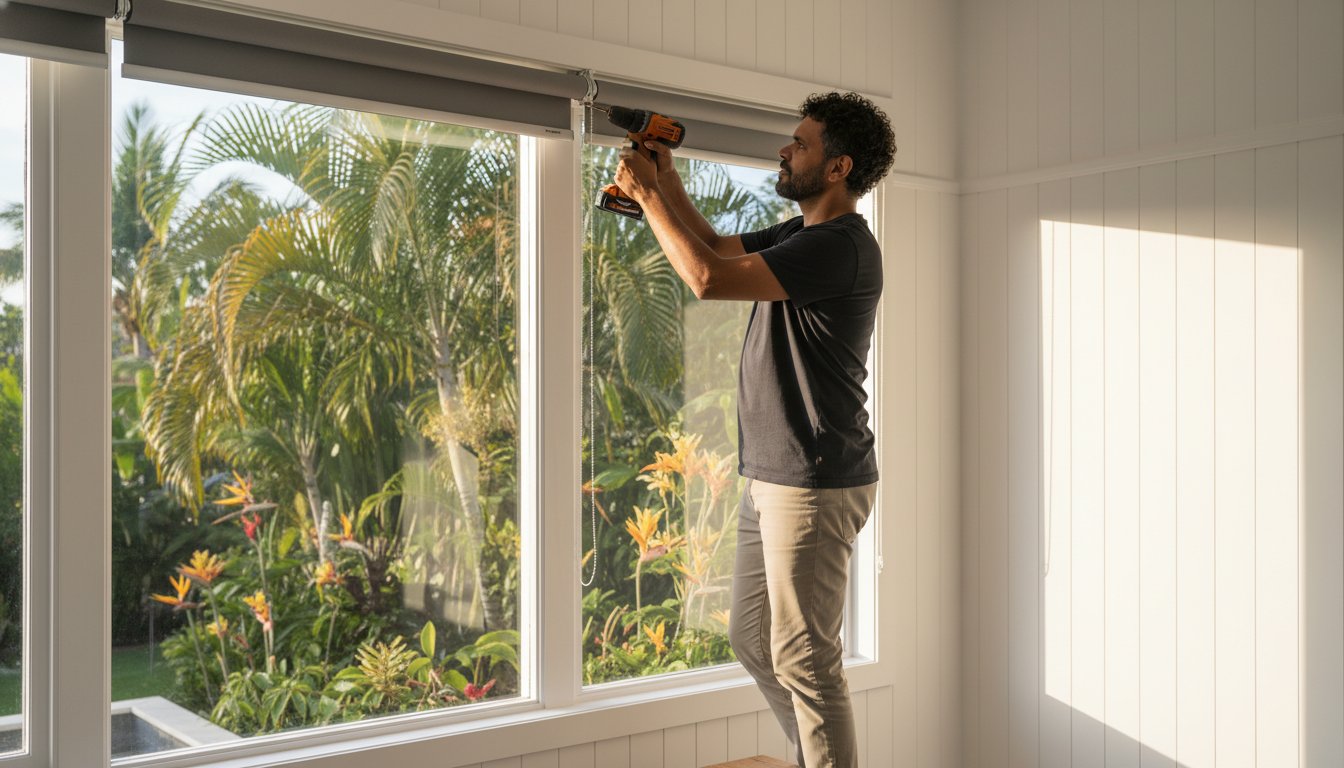
The 5-Step DIY Roller Blind Installation Process
Getting your new window coverings up shouldn’t take all weekend. In fact, most of our customers find that an easy DIY roller blind installation takes less than 20 minutes per window once they have their tools ready. You’ve invested in premium, custom-made fabric, so handle the roll with clean hands and keep it off the floor to avoid any fraying or dust marks before it’s even hung. This logical workflow ensures a professional result that looks like you’ve hired a contractor, but with the satisfaction of doing it yourself and keeping those factory-direct savings in your pocket.
Step 1 & 2: Marking and Bracket Mounting
First, decide which side your chain will sit on. This is usually determined during your ordering process, but you need to match the “chain end” bracket with your chain mechanism and the “idle end” bracket with the pin side. Hold your brackets in place and use a sharp pencil to mark the exact centre of the screw holes. Drilling 2mm or 3mm pilot holes is a smart move because it prevents the timber frame from splitting; this is vital for older Australian homes with seasoned hardwood frames. Secure the brackets firmly using the provided screws. A loose bracket is the main cause of a wonky blind, so ensure they’re flush against the mounting surface.
Step 3 & 4: Hanging the Blind and Engaging the Mechanism
Pick up your blind and guide the spring-loaded idle end into its bracket first. This provides the necessary leverage and tension to align the other side without struggling. Once the idle end is depressed, guide the chain drive side into the opposite bracket. You are looking for a distinct “click” sound. This audible snap is your confirmation that the mechanism is safely locked in place. If you don’t hear it, the blind could slip out during operation. Check that the fabric is centered within the window opening. If it’s off by more than 5mm, you might need to nudge your brackets slightly to ensure a seamless, balanced look across the glass.
Step 5: Testing and Adjusting the Limit Stops
Slowly pull the chain to lower the blind and check the tracking. Watch for “telescoping,” which is when the fabric rolls unevenly to one side. If this happens, a small piece of masking tape on the tube (on the opposite side of the drift) can fix the balance instantly. You also need to set your limit stops to ensure the blind doesn’t roll off the tube or retract too far into the mechanism. While you’re finishing up, remember that all installations must comply with Australian mandatory safety standards regarding cord tension and child safety devices. This ensures your home stays stylish and safe for the whole family.
Once the chain moves freely without catching on the brackets and the bottom rail sits perfectly level, you’ve mastered the process. It’s a straightforward way to transform your room’s atmosphere while adding real value to your property. If you’re ready to tackle the next room in your home, you can browse our custom-made range to find the perfect match for your aesthetic. Our Australian-made products are designed for durability and style, making it easy to achieve that high-end look on a DIY budget.
Mastering Different Surfaces: Wood, Plaster, and Masonry
Australian homes feature a diverse range of construction styles, from 1950s double-brick bungalows to modern apartments finished with slimline plasterboard. Because of this variety, your drill bit and fixings must match the specific material of your window frame. If you try to force a standard timber screw into a concrete lintel, you will likely snap the screw head or burn out your drill motor. Identifying the substrate behind your paint or wallpaper is the first step toward a professional result. Give the wall a firm tap with your knuckle; a hollow, echoing sound indicates plasterboard over a timber or steel frame, while a solid, dull thud usually means you are dealing with internal brickwork or concrete.
Success in an easy DIY roller blind installation depends on the strength of your anchor points. A standard 1.2-metre wide roller blind can weigh between 3kg and 5kg, but the force applied when pulling the chain increases that load significantly. You need a fix that won’t wobble or pull free over time. We recommend using 8-gauge screws for most residential projects, as they provide the ideal balance of thickness and grip for standard bracket pre-drilled holes. Always check your hardware kit before you start to ensure you have the right length for your specific wall depth.
Drilling into Timber Architraves
Timber is the most forgiving surface for DIYers and remains the most common mounting point in Australian homes. Whether you are mounting to a 19mm thick pine reveal or a decorative hardwood architrave, standard wood screws are usually sufficient. However, pilot holes are non-negotiable. Using a 2mm or 2.5mm drill bit to create a guide hole prevents the timber from splitting, which is a common issue in older, dried-out hardwood frames. Aim for a screw length of at least 30mm to ensure the thread has enough “bite” to hold the weight of the blind securely during daily operation.
Securing Blinds to Plasterboard and Masonry
When you cannot find a solid timber frame, you must adapt your strategy. For plasterboard walls, always start with a stud finder to locate the 90mm vertical timber studs. If the studs don’t align with your bracket placement, you must use hollow wall anchors. Products like Ramset or similar heavy-duty toggles are rated to hold up to 10kg or 15kg in 10mm plasterboard, providing the stability needed for larger blinds. For a truly professional finish, this step-by-step installation guide provides excellent context on how these fixings interact with different wall types.
Masonry requires a bit more muscle. If you are drilling into brick or a concrete lintel above the window, you will need a hammer drill and a masonry bit, typically 6mm in diameter. These bits feature a wide, carbide-tipped head designed to pulverize stone rather than cut it. Once the hole is drilled to the correct depth, insert a plastic wall plug, often called a “Green Plug” in local hardware stores, before driving your screw. This expansion plug creates a friction lock inside the brick that is virtually impossible to pull out. This method ensures your easy DIY roller blind installation remains rock solid for years to come, even in high-traffic areas like the lounge or kitchen.
Safety Standards and Achieving a Professional Finish
You’ve reached the final stages of your easy DIY roller blind installation, and this is where a good job becomes a great one. While the brackets are up and the blinds are hanging, the difference between a basic setup and a premium A$5,000 professional look lies in the details. Achieving that high-end aesthetic isn’t just about how the fabric hangs; it’s about ensuring every component is calibrated for performance and safety. We want your home to look like a designer showroom while keeping your family 100% protected.
ACCC Child Safety Compliance
Safety isn’t just a recommendation in Australia; it’s a legal requirement governed by strict ACCC regulations. Every year, unsecured cords pose a significant risk to toddlers, which is why your installation must include a tension device for every chain. You must install the tensioning device at a height that prevents the loop from becoming loose or sagging. The Australian Standard for corded internal window coverings as of 2026 mandates that all products must incorporate permanent safety devices and meet rigorous structural integrity tests to eliminate strangulation hazards for children.
To stay compliant, ensure the bottom of any loop is at least 1600mm above the floor level. If your chain is longer, you must use the provided cleat or tensioner to fix it firmly to the wall or architrave. This 1600mm rule is the gold standard for Australian homes. Using a drill to secure these devices takes less than 2 minutes, but it provides a lifetime of peace of mind. Don’t skip this step; a professional finish always prioritises the safety of little ones.
Troubleshooting Common Install Issues
Even the most experienced DIYers occasionally deal with a window frame that isn’t perfectly square. If you notice your blind fabric is “telescoping” (spiralling toward one side as you raise it), don’t panic. This usually happens because the tube isn’t perfectly level. A simple pro-tip is to unroll the blind fully and place a 20mm piece of masking tape on the end of the metal tube opposite the direction the fabric is drifting. This tiny adjustment changes the diameter of the tube enough to pull the fabric back into alignment.
- Leveling non-square frames: Use thin plastic shims behind the mounting brackets to correct a 2mm or 3mm deviation.
- Eliminating light gaps: Ensure your brackets are perfectly centred within the reveal to keep gaps symmetrical.
- Smooth operation: If the chain feels stiff, check that the brackets aren’t compressed too tightly against the idle end.
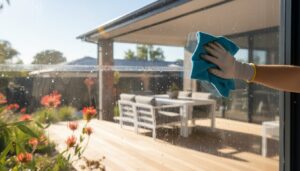
If your window frame is significantly out of square, those hidden shims are your best friend. By packing out one bracket slightly, you ensure the blind sits level even if the timber frame is wonky. This prevents the fabric from fraying against the brackets over time. Once the blind is rolling straight, use a clean microfibre cloth to remove any fingerprints or dust from the fabric and bottom rail. This final wipe-down creates that crisp, “just-installed” look that defines a premium custom product.
To keep your rollers looking new for years, a quick monthly dust with a vacuum brush attachment is all it takes. For minor marks, a damp cloth with a tiny bit of mild detergent works wonders on our durable fabrics. Ready to upgrade your home with confidence? You can shop our child-safe roller blinds today and get that professional look for a fraction of the cost.
Why Custom DIY Blinds Beat Off-the-Shelf Options
Choosing between a custom-made product and a retail “cut-to-size” option is the difference between a professional finish and a frustrating weekend project. While a mass-produced blind might carry a lower price tag at the checkout, the hidden costs in time, tools, and replacement parts quickly add up. Most off-the-shelf blinds use thinner 25mm or 32mm tubes that often bow under the weight of the fabric within the first 12 months. In contrast, our custom solutions provide a seamless easy DIY roller blind installation because every component is engineered for your specific window dimensions. You won’t find yourself struggling with generic parts that almost fit; you’ll have a system designed for your home’s exact needs.
No Cutting, No Fraying, No Stress
The biggest hurdle in a standard retail installation is the manual resizing process. Trimming a blind yourself usually involves a hacksaw for the metal and steady hands for the fabric; it’s a recipe for jagged edges and fraying threads. Because we manufacture to the exact millimetre, your blinds arrive ready to click into place. We use heavy-duty 40mm or 45mm reinforced aluminium tubes that stay perfectly straight, ensuring the fabric rolls evenly every time. This precision is why we confidently back our products with a 3-year Aussie Online Blinds warranty. This is a significant jump over the basic 12-month coverage found on many imported retail alternatives that often fail after a single summer season.
Factory-Direct Savings for Your Home
By taking the measurements yourself and handling the simple fitting, you eliminate the “middle-man” installer fee. These call-out fees often start at A$150 per visit in major Australian cities. These savings allow you to upgrade to premium Australian-made fabrics without blowing your budget. You can invest in high-performance blockout materials that provide 100% light exclusion or heat-reflective sunscreen fabrics that can reduce solar gain by up to 85%. Our factory-direct model means you’re paying for quality materials, not a technician’s van and travel time. Start your DIY journey by ordering your free fabric samples from Aussie Online Blinds today!
Local support makes a world of difference when you’re tackling home improvements. Based right here in Brisbane, our team understands the harsh Australian sun and the specific needs of local homes. If you have a question during your easy DIY roller blind installation, you aren’t calling an overseas service center. You’re talking to experts who know the product inside and out. We provide clear, plain-English guidance that turns a potentially daunting task into a quick afternoon win. You get the satisfaction of a job well done, backed by the reliability of a local business that stands behind every blind we ship. Our fabrics are specifically tested for Australian conditions, ensuring they don’t fade or perish like cheaper, mass-produced imports often do after just a few months of exposure to high UV levels.
Ultimately, the “can-do” attitude of a DIY project is much easier to maintain when the products are high quality. You don’t need a workshop full of tools to get a high-end look. With a simple drill and a level, you can transform your living space. We’ve simplified the process so that anyone, regardless of their previous handyman experience, can achieve a millimetre-perfect result. It’s about giving you the confidence to take control of your home styling while saving money and ensuring your window furnishings last for years to come.
Transform Your Windows with Professional Confidence
Ready to upgrade your space? You’ve now got the professional blueprint to handle any surface from 10mm plasterboard to solid brick masonry. By following our 5-step process, you’ll ensure your window furnishings meet strict Australian child safety standards while achieving a seamless finish. Choosing custom-made products means you avoid the frustrating light gaps often found in standard 600mm or 1200mm off-the-shelf alternatives. Mastering an easy DIY roller blind installation isn’t just about saving A$100 or more per room on labor costs; it’s about the pride of a job well done. As a proudly Australian family-owned business, we manufacture every blind right here in our Brisbane factory to guarantee a millimetre-perfect fit for your specific measurements. Every order comes backed by our solid 3-Year Warranty, giving you total peace of mind for years to come. You’ve got the tools and the expert know-how, so it’s time to give your windows the premium look they deserve.
Browse our range of easy-to-install custom roller blinds
Frequently Asked Questions
Is it hard to install roller blinds yourself?
It’s actually very straightforward to achieve an easy DIY roller blind installation without hiring a professional installer. Most of our customers report that they can complete the entire process in about 15 to 20 minutes per window. Since we provide custom-made blinds that fit your specific measurements, you won’t need to struggle with cutting materials or complex adjustments. If you can handle a cordless drill, you’ve definitely got this.
What tools do I need for DIY roller blind installation?
You only need five basic household tools to get the job done properly. Grab a steel tape measure, a pencil for marking, a spirit level to ensure everything is straight, a cordless drill with a 3mm bit, and a Phillips head screwdriver. We include all the necessary screws and mounting brackets in your package. Having these items ready ensures your easy DIY roller blind installation goes smoothly from start to finish.
Can I install roller blinds into plasterboard without a stud?
Yes, you can mount blinds into plasterboard, but you must use specific hollow wall anchors like Zip Toggles or WallMates that are rated for at least 10kg. Standard plastic plugs often pull out because a 1.2 metre roller blind can exert significant leverage when operated. For the most secure fit, we recommend finding a timber stud behind the plaster, but quality anchors provide a reliable alternative for 95% of modern Australian homes.
How do I fix a roller blind that is rolling crooked (telescoping)?
You can fix a telescoping blind by placing a 5cm piece of masking tape on the metal tube on the opposite side of the drift. If the fabric is veering to the left, roll the blind down fully and stick the tape on the right side of the roller. This tiny increase in diameter levels the roll. In 90% of cases, this simple adjustment solves the problem immediately without needing to move your brackets.
What is the Australian law regarding blind cord safety?
Australian law, specifically the Competition and Consumer Standard 2010, requires all corded blinds to be installed with a fixed tension device. This safety device must be secured to the wall or architrave so that the cord loop cannot hang loose. You must ensure the cord remains at least 1.6 metres above the floor level to prevent strangulation hazards for children. Every blind we ship includes these mandatory safety components and warning labels.
How long does it take to install one roller blind?
You should expect to spend roughly 15 to 20 minutes on each window from start to finish. This timeframe includes 5 minutes for measuring and marking your bracket positions, 5 minutes for drilling and mounting, and 5 minutes for clicking the blind into place and securing the safety tensioner. First-time DIYers might take 30 minutes for their first window, but the pace quickens once you find your rhythm.
Do I need two people to install large roller blinds?
We recommend having a second person help you if the blind is wider than 1.8 metres. While the brackets are easy to install alone, lifting a heavy 2.4 metre custom blind and aligning it into the brackets can be awkward for one set of hands. Having a mate hold one end prevents the fabric from dropping or hitting the floor, which protects your premium materials from accidental damage during the final step.
What happens if my window frame isn’t perfectly square?
If your window is out of square by more than 5mm, you can use small packers or shims behind the brackets to level the blind. Most Australian homes have slight settling, so a spirit level is your best friend here. Simply adjust the height of one bracket slightly to compensate for the slope. This ensures your blind hangs straight and operates smoothly, even if your architrave is a bit wonky.