
Staring at that beautiful new roller blind, drill in hand, and feeling a little nervous? You’re not alone. The thought of a crooked finish or a rogue hole in the window frame can make any diy roller blind installation feel like a high-stakes job. Many Aussies hesitate, worried about which tools to grab, the difference between a recess and face fit, or that the final result will look anything but professional.
Well, you can put those worries to bed. Forget paying hundreds in professional installation fees! We’ve created this simple, step-by-step guide to give you the confidence to get the job done right, the first time. We’ll walk you through every stage, from unboxing to the final checks, ensuring your new custom-made blinds are perfectly level, operate smoothly, and instantly elevate your room. Get ready to enjoy that satisfying “I did it myself” feeling and a flawless finish.
Key Takeaways
- A flawless finish starts with the right prep; learn the simple tools and checks you need before you even pick up a drill.
- Master the most crucial step: positioning your brackets perfectly to ensure your new blind is level and operates smoothly.
- Discover how a successful diy roller blind installation comes down to a few simple final steps, with your blind clicking securely into place.
- Hit a snag? Our quick troubleshooting tips will help you solve common issues fast and get your project back on track with confidence.
Before You Begin: Prep for a Perfect Finish
Every great Brisbane home project starts with solid prep work, and a flawless diy roller blind installation is no different. We reckon that taking ten minutes to get organised before you start is the secret to a stress-free job. It saves you from scrambling for a tool or discovering a problem halfway through. This simple guide will walk you through the essential checks and tools needed, ensuring you have everything on hand for a smooth, professional-looking finish. Let’s get you set up for success!
Unpack and Check Your Order
Before you get too excited, carefully unbox your new custom-made roller blind on a clean, flat surface like a rug or a blanket to avoid any scuffs. Lay out all the parts and check them against the components list included in your delivery. You should have your beautiful new blind, two mounting brackets, and the necessary screws. Most importantly, grab your tape measure and give the blind one final check against your window measurements. A quick confirmation now prevents any headaches later.
Gather Your Essential Tools
Having the right gear makes all the difference. You won’t need a whole workshop, just a few key items to get the job done right. We recommend gathering these before you climb any ladders:
- A reliable power drill with the correct drill bits for your wall type (plaster, timber, etc.).
- A sturdy step ladder for safe and easy access to the top of your window.
- A quality metal tape measure for pinpoint accuracy.
- A sharp pencil for marking and a spirit level to guarantee a perfectly straight result.
Recess Fit vs. Face Fit: Know Your Mount
Understanding your mount type is crucial, as it determines where you’ll be drilling. While there are many different types of window blinds, roller blinds typically use one of two mounting styles. A Recess Fit means the brackets are installed inside the window frame (the recess), creating a clean, seamless look that’s flush with the wall. A Face Fit, on the other hand, involves fixing the brackets to the wall or architrave above the window. This is a great choice for maximising light blockout or covering less-than-perfect window frames.
Step-by-Step: Installing Your Roller Blind Brackets
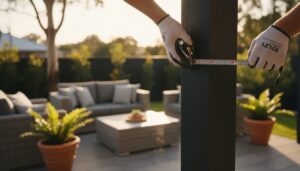
Right then, let’s get to the most important part of your diy roller blind installation: the brackets. Think of them as the foundation for your beautiful new blind. Getting them perfectly level and secure is the secret to a professional-looking finish and a blind that rolls as smooth as silk for years to come. It’s not just about aesthetics; correct installation is a crucial first step for overall functionality and is fundamental to good blind cord safety. Remember the golden rule of any project here in Brisbane: measure twice, drill once!
Marking Your Bracket Positions (Face Fit)
A ‘Face Fit’ or ‘Outside Mount’ is perfect when you want your blind to overlap the window architrave. This method can make a window appear larger and provides excellent light block. Here’s how to get your marks spot on:
- Position your first bracket on the architrave, about 50-100mm out from the side of the window recess.
- Use your spirit level to extend a perfectly level line across to the other side, marking the position for the second bracket.
- Hold each bracket firmly in place and use a sharp pencil to mark the screw holes. Double-check that your marks are level before you pick up the drill!
Marking Your Bracket Positions (Recess Fit)
For a sleek, minimalist look, the ‘Recess Fit’ or ‘Inside Mount’ is the way to go. The blind sits neatly inside the window frame, giving you a clean, seamless finish. Follow these simple steps:
- Position one bracket at each end, inside the top of the window frame (the ‘head’).
- Push them as far back towards the glass as you can, ensuring you still have clearance for any window handles or locks to operate freely.
- Make sure each bracket is pushed up snugly against the top of the recess. Hold it firmly and mark your screw hole positions with a pencil.
Drilling Pilot Holes & Attaching the Brackets
With your positions marked, you’re on the home stretch. Taking a moment to drill pilot holes makes attaching the brackets a breeze and prevents the screws from splitting the timber. This final hardware step is what brings it all together.
- Choose a drill bit that’s slightly smaller in diameter than the shank of the screws provided.
- Carefully drill your pilot holes on the pencil marks you made. Keep the drill straight for a clean hole.
- If you’re drilling into brick or masonry, gently tap a wall plug into each hole until it’s flush with the wall surface.
- Now, simply line up your brackets with the holes and use your screwdriver or drill to securely fasten them with the screws provided. Give them a gentle tug to ensure they’re rock solid.
The Final Steps: Mounting Your Blind & Finishing Touches
Right then, you’re on the home stretch! This is the most satisfying part of any diy roller blind installation, where all your careful measuring and prep work comes together in a matter of minutes. You’ve done the hard yards, and now it’s time to see your beautiful new blind in its rightful place. We’ll click the blind into its brackets, secure the legally required child safety device, and give it a final test run to ensure years of flawless operation.
Clicking the Blind into the Brackets
First, pick up your custom-made roller blind. You’ll notice it has two distinct ends: a ‘pin end’ (a small retractable pin) and the ‘control end’ where the chain mechanism is housed. The process is simple:
- Take the pin end and insert it into the hole on its corresponding bracket.
- Now, align the control end with the open slot on the other bracket. Push it up firmly until you hear a solid, reassuring “click”.
- Give the blind a gentle tug downwards to make sure it’s locked in securely. Too easy!
Attaching the Child Safety Tensioner
This is a crucial step for the safety of any children or pets in your home. In Australia, installing a child safety device on any corded blind is a legal requirement. Let the blind hang down to its full length so the chain loop is at its longest. Position the tensioner on the window frame or wall, ensuring the chain is taut but not stretched. Mark the screw hole with a pencil, drill a small pilot hole, and then securely fasten the tensioner with the provided screw.
Making a room child-safe goes beyond just the windows. For those outfitting a nursery or playroom, finding other high-quality, problem-solving items is often the next step. Online stores like TipTop360 offer curated collections that can help, even providing inspiration for those of us in Australia.
Testing Your New Blind
With everything in place, it’s time for the moment of truth. Gently pull the chain to operate the blind, rolling it all the way up and then back down. You’re looking for a smooth, quiet motion without any catching or snagging. Check that the fabric rolls up evenly into a neat cylinder and doesn’t ‘telescope’ or veer off to one side. A perfectly installed blind will operate like a dream from day one.
With your blind operating smoothly, you’re all set to enjoy the benefits. A well-fitted blind not only provides privacy and style but can also improve your home’s insulation. Choosing the right blockout fabric can turn your windows into energy-efficient roller blinds, helping to keep your Brisbane home cooler in summer and warmer in winter-a real win-win for comfort and your power bills.
Feeling proud of your work? You should be! Ready for the next window? Shop our custom Australian-made roller blinds now.
Pro Tips & Troubleshooting Common Issues
Even the most seasoned DIYer can run into a small snag. But no worries, a little bit of know-how is all you need to get a flawless, professional finish for your Brisbane home. These expert tips will help you solve common issues quickly and avoid the usual pitfalls, ensuring your diy roller blind installation goes off without a hitch. And if you decide DIY isn’t for you, there’s always the option of professional fitting—a service offered by specialists like Universal Blinds UK who handle the entire process from supply to installation.
Help! My Blind Is Rolling Up Crooked
This is a classic issue known as ‘telescoping’ or ‘tracking’, where the fabric gathers to one side. It almost always means the blind isn’t hanging perfectly level. The fix is easy as! Simply add a small piece of masking tape to the exposed roller tube on the opposite side to where the fabric is bunching up. This tiny adjustment helps the fabric grip and realign itself. Add one layer at a time until it rolls straight.
Choosing the Right Screws & Wall Plugs
Using the right fixings is crucial for a secure fit. For standard plasterboard walls, the screws we provide are perfect. If your drill hits a timber stud behind the plaster, you’ve hit the jackpot – no wall plug is needed! For brick or concrete walls, common in many Queenslanders, you’ll need to use masonry wall plugs to get a solid grip. Always give the brackets a firm tug before hanging the blind to ensure they’re secure.
How to Avoid Common Installation Mistakes
A little prep work goes a long way. Keep this simple checklist handy to ensure your project is a complete success from the get-go:
- Check for Obstructions: Before you drill, fully open and close your window. Make sure the blind won’t foul on window handles, locks, or winders.
- Measure Twice, Order Once: The most critical step happens before installation. Incorrect measurements are the number one avoidable mistake. Double-check your figures to ensure a perfect fit.
- Always Use a Spirit Level: Don’t just eyeball it! Using a spirit level to install your brackets guarantees your blind will hang straight and operate smoothly.
- Install the Child Safety Device: This isn’t optional-it’s essential for keeping little ones safe and is a legal requirement in Australia. Always secure the chain or cord with the provided safety tensioner.
By keeping these tips in mind, your new custom-made blinds will look like they were installed by a pro. For more guidance or to explore our full range of Australian-made products, feel free to browse our resources at aussieonlineblinds.com.au.
Your Flawless Finish Awaits: You’ve Got This!
And there you have it – a complete guide to a flawless finish! As you can see, achieving a professional look is simpler than you might think. By taking the time to properly measure and prepare your window, securely fitting the brackets, and carefully mounting the blind, you’ve tackled all the key stages. This guide proves that a successful diy roller blind installation is entirely within your reach, empowering you to refresh your space with confidence and style.
Now that you have the know-how, it’s time to bring your vision to life. At Aussie Online Blinds, we’re passionate about helping you create a home you love. When you choose us, you’re not just getting a premium, custom-made product; you’re supporting a business that is Proudly Australian Made & Owned. Plus, you’ll save hundreds on installation costs with our straightforward DIY system, and every blind comes with the peace of mind of a 3-Year Warranty.
Ready for your project? Design and order your custom roller blinds online! Give your windows the beautiful, practical update they deserve. You’ll be amazed at what you can achieve.
Your DIY Roller Blind Questions Answered
Can I install a roller blind by myself?
You bet you can! Our Aussie-made roller blinds are designed specifically for an easy diy roller blind installation. With a few basic tools like a power drill, a tape measure, and a spirit level, you’ll have them up in no time. We provide all the brackets and screws you need, along with a simple, step-by-step guide. It’s a brilliant way to save a bit of cash and get a real sense of satisfaction from a job well done.
How high above the window frame should I mount a face fit blind?
For a professional look that makes your windows appear larger, we recommend mounting your face fit blinds about 50 to 100mm above the top of the window frame (the architrave). This placement not only creates an illusion of height but also helps to minimise light gaps at the top of the window when the blind is closed. It’s a simple trick that gives you a more polished, room-darkening result and a truly seamless finish for your Brisbane home.
What do I do if I drill the hole in the wrong place?
No worries, mate, it happens to the best of us! If you’ve drilled a hole slightly off the mark, it’s an easy fix. Just fill the hole with a bit of wall putty or Spakfilla from your local hardware store. Once it’s dry, give it a light sand until it’s flush with the wall and touch it up with a bit of matching paint. Then, take a deep breath, double-check your measurements, and drill your new hole with confidence.
Do I really need a power drill to install blinds?
While you might manage with a screwdriver for very soft plasterboard, we strongly recommend using a power drill. It makes the job quicker, easier, and much more secure. A drill ensures the screws go in straight and tight, especially when you’re fixing into a solid timber architrave or need to use wall plugs for masonry. It’s the key to a sturdy, professional-quality installation that will last for years to come. Borrow one from a mate if you don’t own one!
How long does a typical DIY roller blind installation take?
You’ll be surprised how quick it is! For your first blind, we’d set aside about 20 to 30 minutes to read the instructions and get the hang of it. Once you’ve done one, you’ll find the rest fly by, often taking as little as 10 to 15 minutes each. It’s a perfect weekend project that delivers a massive style upgrade for your home without eating up all your time. You’ll be kicking back and admiring your handiwork in no time.
Are the screws provided suitable for all wall types?
We provide high-quality screws that are perfect for installing directly into timber window frames or studs. However, if you’re mounting onto plasterboard (drywall) or masonry like brick or concrete, you’ll need the right wall anchors. A quick trip to Bunnings or your local hardware shop is all it takes to grab the correct wall plugs for your surface. Using the right fixing ensures your beautiful new blinds are secure and safely mounted for the long haul.