What if the only difference between a ‘cheap’ DIY job and a designer outdoor area is a few simple measurements and a bit of local advice? When you’re weighing up diy outdoor blinds vs professional installation, it’s easy to feel stuck between the high cost of expert labor and the fear of making a mistake. You want a space that looks like it belongs in a magazine and stays secure during a summer storm, but you don’t want to hand over a small fortune for labor. It’s a common worry, especially when you’re trying to balance high-end quality with a sensible budget.
The reality is that modern, custom-made kits now offer the same heavy-duty hardware used by the pros, making a showroom finish more attainable than ever. With professional installation costs often adding A$150 to A$300 per blind to your total bill, the DIY route can save you thousands of dollars. This guide explores how to ensure your project meets Australian Standards for wind resistance and durability. We’ll walk through the practicalities of self-installation for everything from Zipscreen to pivot arm blinds, giving you the confidence to measure accurately and finish the job like an expert. You’ll discover how to create a comfortable, year-round living space using high-quality products built for our unique climate.
Key Takeaways
- Discover how skipping the professional markup can save you thousands while still securing high-end, Australian-made hardware.
- Learn the truth about durability and why modern DIY kits match the quality of professional-grade installations.
- Use our simple readiness checklist to see if your patio or pergola is a perfect candidate for a self-installed project.
- Weigh up the pros and cons of diy outdoor blinds vs professional installation to decide which path fits your budget and timeline.
- Master the secrets to achieving a perfectly level, showroom finish that stands up to the harsh Australian sun and wind.
DIY Outdoor Blinds vs. Professional Installation: The Great Debate
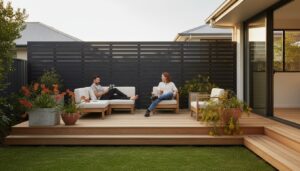
Aussie homeowners are taking a more hands-on approach to their properties than ever before. By mid-2026, the trend of self-installation has moved from a niche hobby to a standard way to save money without losing out on style. Outdoor blinds are at the heart of this shift. They transform a simple deck or patio into a versatile, year-round living space that adds genuine value to your home. Whether you’re looking for Zipscreen outdoor blinds or a simple straight drop, the decision usually boils down to one question: diy outdoor blinds vs professional installation.
The core dilemma is simple. Is the convenience of a professional installer worth the significant price premium? Many people worry that if they don’t hire an expert, their blinds won’t last in the harsh Australian wind or look quite right against their home’s exterior. However, with the rise of custom-manufactured kits, the gap between a professional job and a DIY project has almost disappeared. Understanding different kinds of window blinds and how they fit your specific space is the first step toward making a choice that suits your lifestyle and your wallet.
What Does ‘Professional Installation’ Actually Include?
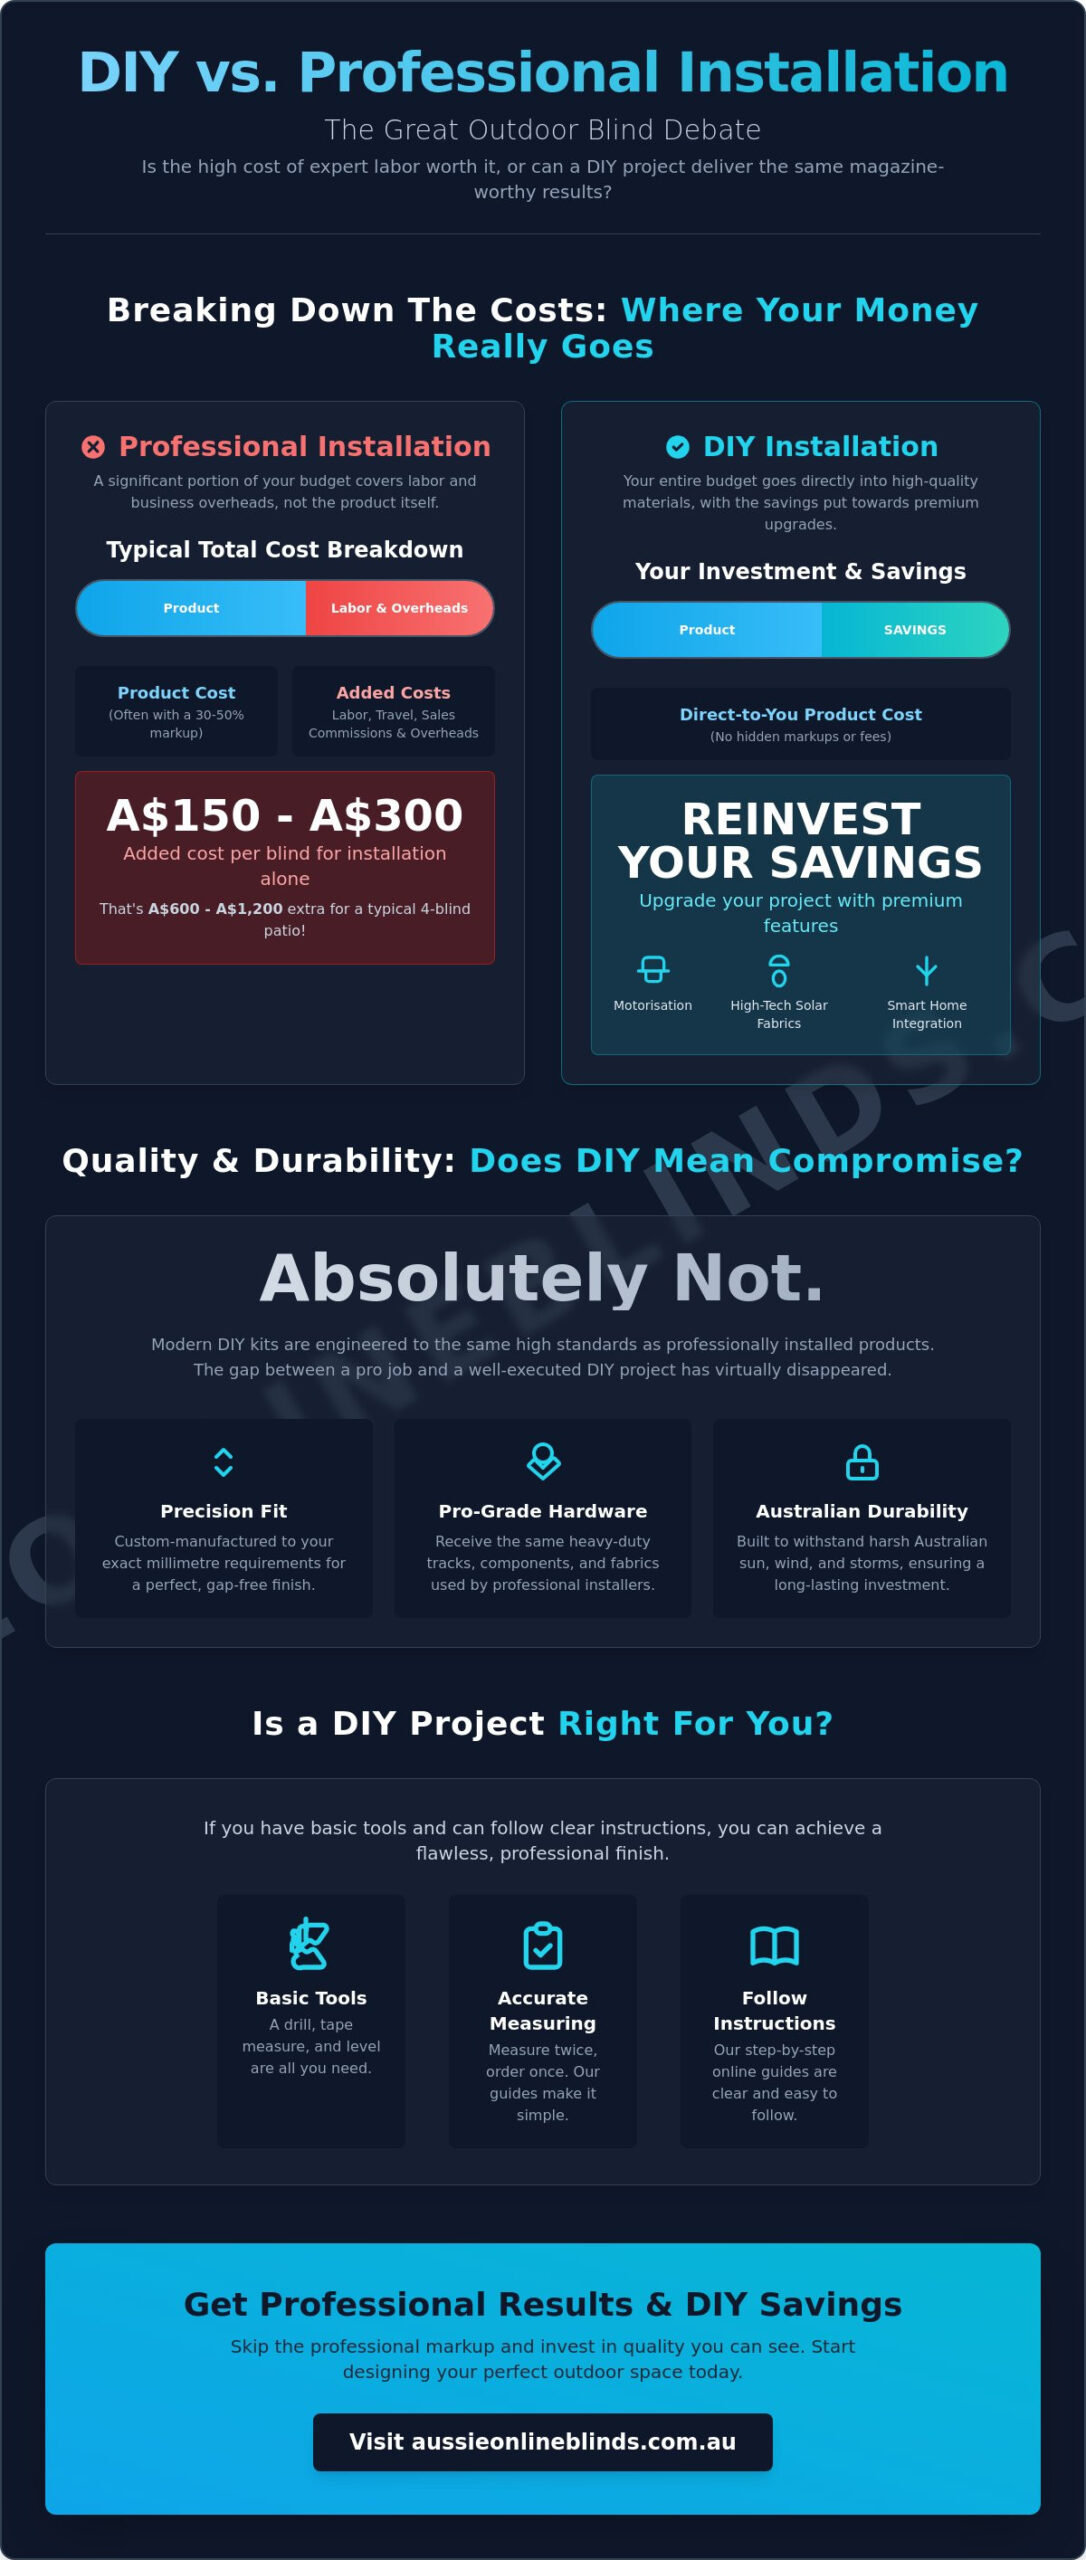
When you book a full-service company, you aren’t just paying for the blinds. You’re paying for a salesperson to drive to your house for an on-site measure and quote. While these visits are often branded as “free,” the costs are always built into the final invoice. You’re also covering the installer’s travel time, their hourly labour rate, and the business’s overhead. In 2026, professional installation for a single blind typically adds between A$150 and A$300 to your bill. While this path offers total convenience, it often doubles the cost of the project without necessarily providing a better quality product than what you can buy online.
The Modern DIY Reality: Custom-Made to Your Specs
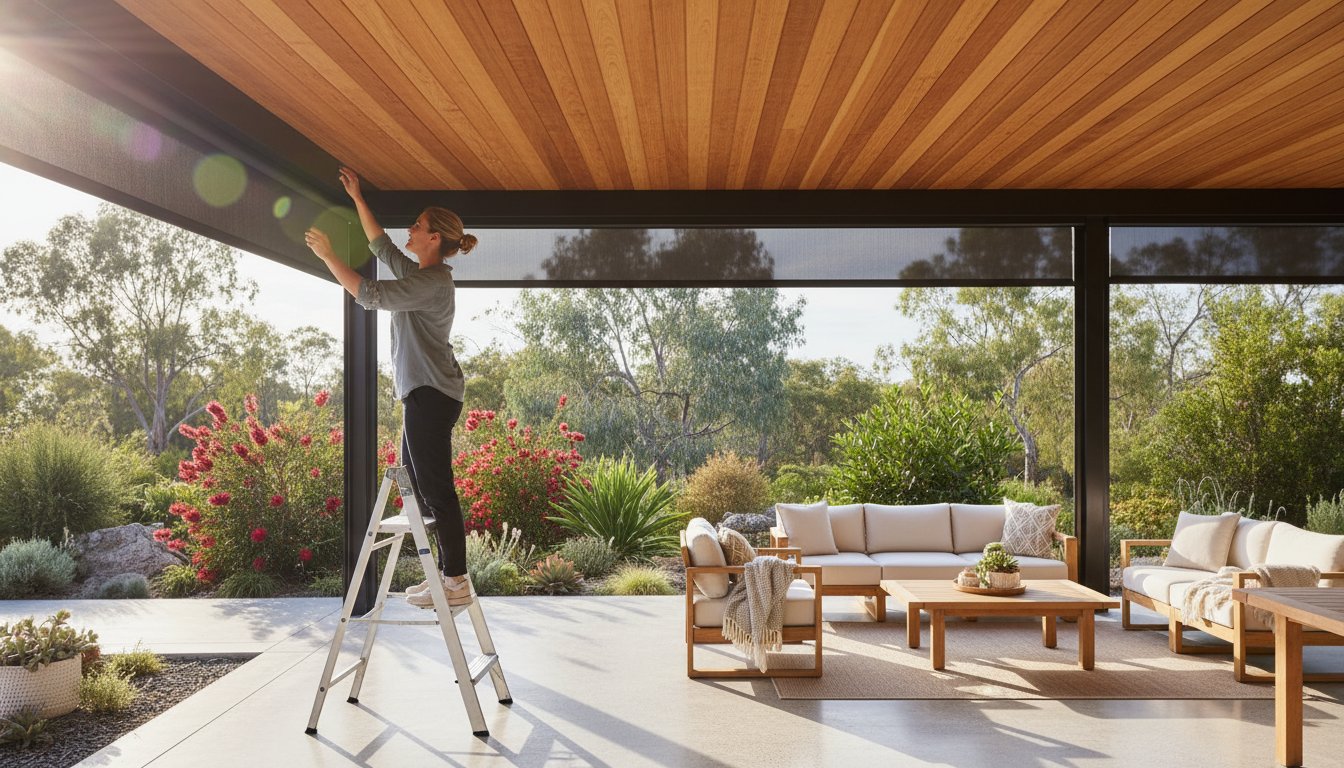
The biggest myth about DIY is that it involves off-the-shelf products that never quite fit. That’s no longer the case. The modern DIY reality is built on precision. When you order through a specialist online provider, your blinds are custom-manufactured to your exact millimetre requirements. This ensures a professional finish every time. Precision-cut tracks and high-quality fabrics mean the blinds slide perfectly into place. You don’t need years of trade experience to get it right. With clear, step-by-step online guides and support, you can achieve the same result as a professional installer while keeping those thousands of dollars in your own pocket.
Breaking Down the Costs: DIY Savings vs. Professional Premiums
Understanding the financial split between diy outdoor blinds vs professional installation is about more than just the bottom line. It’s about seeing where every dollar of your hard-earned money actually goes. When you choose the professional route, you aren’t just paying for a set of blinds. You’re funding a complex business model that includes sales commissions, office overheads, and the technician’s travel time. These costs don’t add any tangible value to your windows; they simply cover the logistics of the service.
By contrast, the DIY approach allows you to put your entire budget into the product itself. This creates a much higher return on investment. Labour costs are “sunk” costs that you never get back. However, the quality of the materials you choose can significantly increase your property’s resale appeal. If you save A$2,000 on installation, you can reinvest that money into premium features like motorisation or high-tech solar fabrics that keep your deck cool in the height of summer.
The Cost of Professional Labour in Australia
Professional installation isn’t cheap in the current market. Most installers charge a rate between A$30 and A$70 per hour, but many prefer a per-blind fee. You can expect to pay between A$150 and A$300 per blind just for the fitting. On a standard four-blind patio, that is an extra A$1,200 before you’ve even considered the cost of the hardware. Many companies also include a “markup factor,” charging 30-50% more for the blinds themselves compared to direct-to-consumer prices. While some structural additions are governed by Australian building laws, most external blinds are considered non-structural and are perfectly safe for a homeowner to install with basic tools.
Direct-to-Consumer Savings: The DIY Advantage
Buying blinds online is the most effective way to bypass the “tradie tax.” You get the exact same professional-grade hardware, such as Zipscreen or pivot arm systems, but at the wholesale price point. Modern shipping logistics have also made large projects much more affordable. Many suppliers now offer flat-rate shipping across Australia, meaning you won’t be penalised for ordering bulky items for a full-house makeover.
Don’t forget to account for the minor “hidden” costs of DIY. You’ll need a reliable drill, a spirit level, and a spare afternoon. Most Aussie sheds already have these essentials. If you’re ready to see how much your specific project could save, browsing our range of DIY outdoor blinds is a great place to start your planning.
Quality, Durability, and Warranty: Does DIY Mean Compromise?
One of the biggest misconceptions in the diy outdoor blinds vs professional installation debate is the idea that doing it yourself means settling for flimsy, off-the-shelf hardware. Many homeowners worry that custom DIY kits are somehow inferior to what a tradesperson would install. This simply isn’t the case. Reputable online retailers use the exact same Tier-1 components that professionals rely on. The durability of your blinds depends on the quality of the materials, such as powder-coated aluminium frames and UV-stabilised fabrics, rather than the person holding the drill.
A professional finish is about precision manufacturing. When your blinds are custom-cut to your exact measurements, they fit perfectly into their tracks, reducing vibration and wear. This is especially important in Australia, where wind load resistance is a key requirement under the National Construction Code. High-quality window treatments can reject up to 75% of solar heat gain, but they need to be built from the right stuff to survive our intense summer sun. By choosing the DIY path, you can often afford higher-spec materials that might have been out of reach once you added a professional’s labour margin.
Component Comparison: Zipscreen and Beyond
When you look at the hardware, Zipscreen outdoor blinds stand out as the gold standard for both trade pros and DIY enthusiasts. These systems are engineered specifically for the tough Australian climate. They feature heavy-duty headboxes and weighted bottom bars that provide exceptional stability during a breeze. Because these products are custom-manufactured locally, they’re built to withstand high UV exposure and coastal salt spray. Choosing Australian-made means you’re getting materials designed for our backyard, ensuring your investment doesn’t fade or corrode after a single season.
Understanding Your Warranty Rights
Your investment is protected by law. A standard 3-year manufacturer warranty typically covers the fabric and hardware against defects, regardless of who handled the installation. The key is to follow the supplied guides to avoid common fitting errors that could void your coverage. It’s also a common secret in the industry that consistent blind maintenance plays a much larger role in longevity than the initial setup. Keeping tracks clear of debris and occasionally cleaning the mesh will do more for your blinds’ lifespan than any professional fitting service ever could. When you weigh up diy outdoor blinds vs professional installation, remember that the hardware’s quality remains the same, provided you choose a specialist supplier.
Evaluating Your Skills: Is DIY Right for Your Project?
Deciding between diy outdoor blinds vs professional installation often comes down to one thing: confidence. You might be worried that you don’t have the “tradie genes” required to get a straight finish, but the truth is simpler than you think. Most modern outdoor blinds are designed for the average homeowner to install using tools already sitting in the garden shed. If you can use a power drill and read a spirit level, you’re already halfway there. The psychological boost of completing the project yourself is a huge bonus, turning a weekend chore into a point of pride every time you sit out on the deck.
Standard installations are the perfect starting point for DIY. If you’re fitting blinds to a typical timber pergola, a brick wall, or a square patio opening, the process is incredibly linear. These “straight-drop” scenarios don’t require complex engineering. However, you should stop and think if your project involves multi-storey external fittings or complex architectural angles. Safety is the priority. For a standard ground-floor area, doing it yourself is a practical way to keep your budget under control while learning a valuable new skill.
The Essential DIY Tool Kit
You don’t need a van full of specialised machinery to get a showroom result. Most DIY blinds are engineered to be fitted with a basic home toolkit. Here is what you’ll typically need:
- A reliable power drill with appropriate bits for timber or masonry.
- A metal tape measure for millimetre-perfect accuracy.
- A spirit level to ensure your headbox and tracks are perfectly straight.
- A sturdy ladder that reaches your mounting points safely.
While the tools are basic, don’t try to go it alone for the actual hanging. A second pair of hands is essential for supporting the weight of the blind while you secure the first few screws. It makes the job safer and much more enjoyable.
Measuring Confidence: Getting it Right the First Time
The fear of measuring incorrectly is what keeps many Aussies from choosing the DIY path. Competitors often claim that a tiny mistake leads to an expensive disaster, but modern ordering systems have fixed this. Our step-by-step guides take the guesswork out of the equation. We use a “Measure Twice, Order Once” philosophy that ensures you’ve checked your widths and drops at multiple points. This accounts for any slight dips in your patio floor or ceiling. If you’re ready to take the first step, check out our comprehensive DIY blinds guide to see just how straightforward the process can be.
The Aussie Online Blinds Advantage: Professional Results for DIYers
Choosing between diy outdoor blinds vs professional installation doesn’t have to be a choice between high-end quality and a sensible budget. We’ve built our business on the belief that every Australian homeowner should have access to showroom-standard finishes without the “tradie tax.” By providing custom-manufactured solutions directly to your door, we’ve removed the need for expensive middlemen and sales commissions. You get the same heavy-duty hardware and precision engineering used by the pros, but you keep the savings in your own pocket. It’s about giving you the tools and the confidence to transform your home on your own terms.
This philosophy of empowering homeowners is gaining traction across the Australian renovation scene, with companies like CutByBEES providing custom-made flat pack cabinetry that follows the same high-quality, DIY-focused model.
Our commitment to local production is a core part of our identity. Every blind we ship is custom-made right here in Australia, specifically designed to handle our unique environmental challenges. Our products are built to withstand Australia’s diverse and demanding climate, from intense sun exposure to harsh coastal elements. We don’t believe in “one size fits all” solutions. Instead, we focus on bespoke craftsmanship that ensures your Zipscreen or Deep Channel blinds fit your space perfectly, providing a seamless look that adds genuine value to your property.
Simplified Installation Systems
We’ve engineered our Zipscreen and Deep Channel systems to be the most installer-friendly options available today. The secret is in the preparation. We do the technical heavy lifting in our factory, pre-assembling as many components as possible to reduce your work on-site. This means you won’t be left puzzling over a box of loose parts. To support you further, we’ve developed a comprehensive library of plain-English instruction manuals and video tutorials. These guides walk you through the process step-by-step, ensuring you feel like an expert from the moment you pick up your drill. If you can follow a simple recipe, you can install our outdoor blinds.
Start Your Outdoor Transformation Today
Ready to reclaim your outdoor space? The journey starts with total certainty. Use our online configurator to design your ideal setup and get an instant price. There are no hidden fees and no high-pressure sales pitches; just straightforward value. We also recommend ordering a set of our free fabric samples. It’s the best way to see exactly how different colours and transparencies work with your home’s natural light. Join the thousands of savvy Aussies who have already settled the diy outdoor blinds vs professional installation debate by choosing the DIY path. You’ll enjoy a professional-looking result and the immense satisfaction of knowing you did it yourself.
Ready to Reclaim Your Outdoor Space?
Deciding on diy outdoor blinds vs professional installation is really about choosing where your budget works hardest. By tackling the project yourself, you aren’t just saving on labour costs; you’re investing in a higher quality of outdoor living for your family. You now know that modern DIY kits provide the same durability as professional setups, especially when they’re backed by a 3-year warranty for your complete peace of mind. As an Australian family-owned and operated business, we take pride in helping you achieve a bespoke look that is custom-made to your exact specifications. You don’t need a trade certificate to create a beautiful, weather-protected patio that adds genuine value to your property. It’s about having the right instructions and a bit of local support to guide your hands. We’re here to help you every step of the way, from your first measurement to the final screw. Take the leap today and see just how easy it is to upgrade your home.
Save on installation and browse our custom DIY Outdoor Blinds today!
Frequently Asked Questions
Is it significantly cheaper to install outdoor blinds myself?
Yes, taking the DIY route is much more cost-effective because you bypass the installer’s labour fees and general business overheads. When you compare diy outdoor blinds vs professional installation, you’ll find that professional labour alone often ranges from A$150 to A$300 per blind. By doing the work yourself, you’re effectively paying yourself those wages while ensuring every cent of your budget goes into premium fabrics and hardware.
What tools do I need for a DIY outdoor blind installation?
You likely already have the necessary tools sitting in your garden shed or garage. You’ll need a reliable power drill with bits suited for your mounting surface, such as timber or masonry, along with a metal tape measure, a spirit level, and a sturdy ladder. These standard tools are all that is required to achieve a level, secure fit that matches any trade professional’s work.
Will I void my warranty if I install the blinds myself?
Your manufacturer warranty remains fully valid as long as you follow the supplied installation guides. These warranties typically cover manufacturing defects in the fabric and hardware for three years. It’s a common myth that you need a professional signature to keep your coverage; just ensure you mount the brackets securely and use the correct fixings for your specific wall or beam type.
How long does it typically take to install one Zipscreen blind?
For a standard patio opening, you should set aside about 60 to 90 minutes for your first blind. This gives you plenty of time to read the instructions, mark your holes, and double-check your levels. Once you’ve mastered the first one, subsequent blinds usually take less than an hour as you become familiar with the bracket system and side channel alignment.
Can I install outdoor blinds on a multi-storey balcony myself?
We generally recommend hiring a specialist if your project involves working at significant heights or on high-rise balconies. While ground-floor patios and pergolas are perfect for DIY, multi-storey installations require specific safety equipment and anchoring techniques. For these complex scenarios, the safety of a professional installer is a wise investment compared to the risks of working on a ladder at height.
What happens if I measure my windows incorrectly for custom blinds?
Because our blinds are custom-manufactured to your exact specifications, they cannot be resized once they’ve been cut. This is why our “Measure Twice, Order Once” philosophy is so important. Using a metal tape measure and checking the width at the top, middle, and bottom of the opening ensures your blinds will slide perfectly into their tracks without any unsightly gaps.
Are DIY outdoor blinds as wind-resistant as professionally installed ones?
Absolutely, because the wind resistance comes from the engineering of the system itself rather than who holds the drill. When you choose diy outdoor blinds vs professional installation, you’re using the same high-spec hardware like Zipscreen side channels. As long as you secure the headbox and tracks into solid structural points like house studs or rafters, your blinds will perform exactly as designed in the Australian breeze.
How many people are needed to install a large patio blind?
Two people are the magic number for a smooth installation, especially for spans wider than two metres. While one person handles the drill and fixings, the second person supports the weight of the headbox to keep it level. This prevents the hardware from twisting and ensures you don’t strain yourself while working overhead, making the process much safer and faster.